BizCRM App
Guide to Configuring Leave Policies in Your Organization: From Calculation Methods to Approval Processes
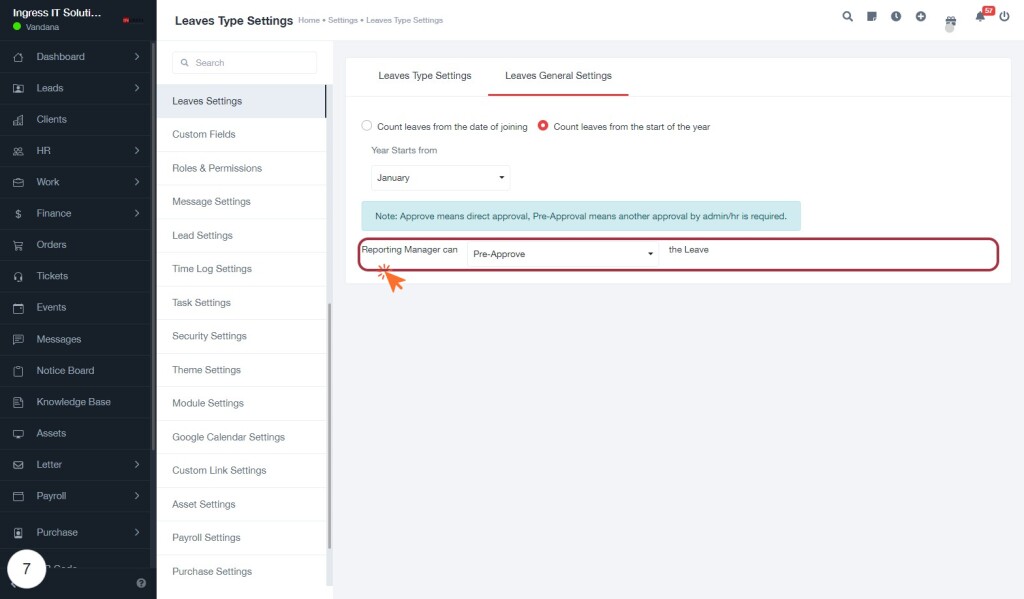
STEP 1: Select "Leaves General Settings" to Configure Leave Policies
- Click on the "Leaves General Settings" tab to access the main configuration options for leave policies.
- You will see two radio buttons:
- Count leaves from the date of joining
- Count leaves from the start of the year
- Choose the appropriate option based on your organizational policy.
- Below these options, a note clarifies that "Approve" means direct approval, while "Pre-Approve" requires additional approval from admin or HR.
- In the Reporting Manager can dropdown, select the desired approval type for leave requests.
Make sure to review your selections before saving any changes.
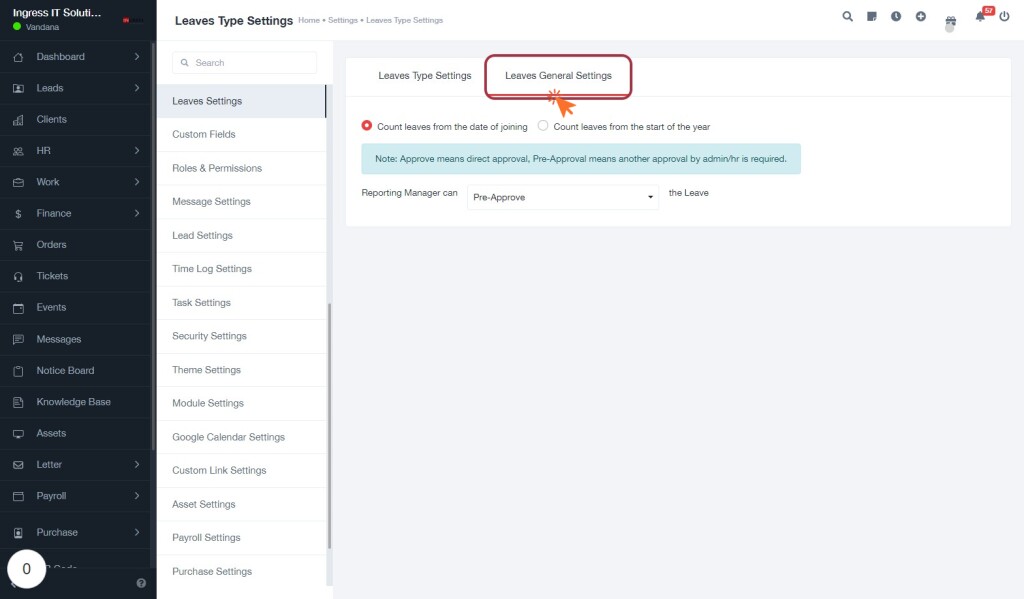
STEP 3: Select "Count leaves from the date of joining"
- Click on the option labeled "Count leaves from the date of joining" to set the leave calculation based on the employee's joining date.
- This selection will adjust the leave accrual process accordingly, ensuring that leaves are counted from the specified date.
- Nearby, you will find an alternative option: "Count leaves from the start date," which can be selected if you prefer a different calculation method.
- Review the Note provided for clarification on the approval process related to leave requests.
- Ensure that the Reporting Manager can setting is configured as needed, allowing for appropriate leave management.
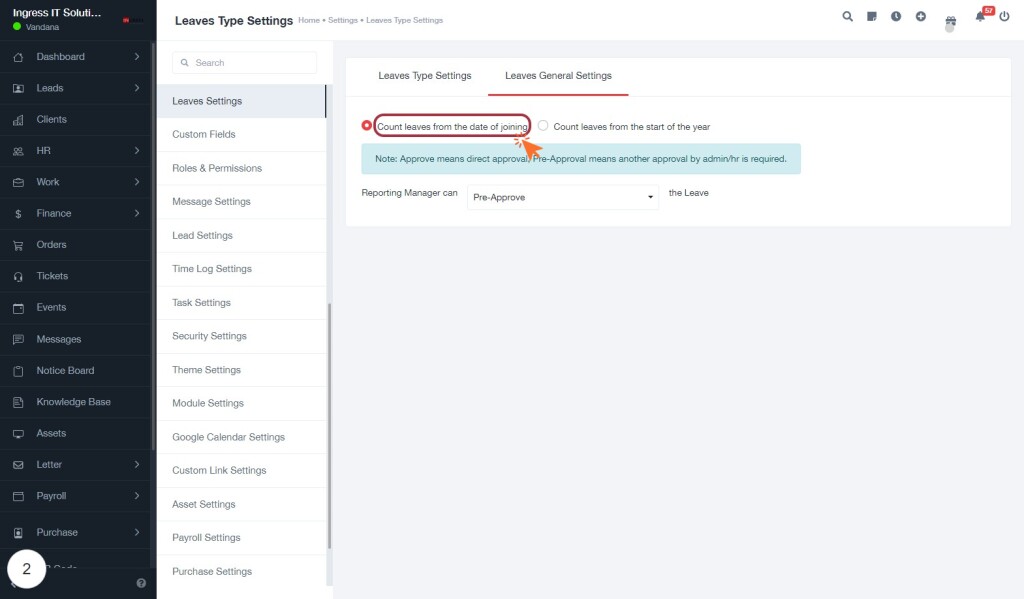
STEP 4: Select "Count leaves from the start of the year"
- Locate the option labeled "Count leaves from the start of the year" within the Leaves General Settings section.
- Click on this option to enable it. This setting determines how leave days are calculated, starting from the beginning of the calendar year.
- Ensure that the selection is highlighted, indicating it is active.
- Review the note below the options for further clarification on leave approval processes, which may impact how leave requests are managed.
- After making your selection, proceed to adjust any additional settings as needed.
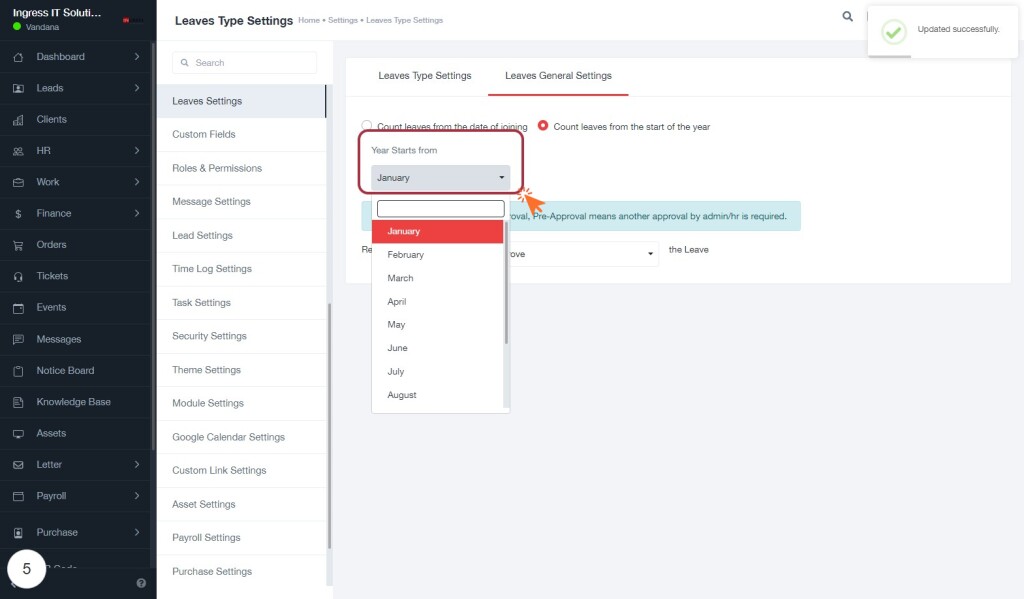
STEP 6: Select "Year Starts from January"
- Click on the dropdown labeled "Year Starts from" to view available options.
- A list will appear, allowing you to choose the starting month for the year.
- Select "January" or any other month from the dropdown list to set the year’s starting point.
- Ensure your selection aligns with your organizational policies regarding leave management.
- After making your selection, review other settings on the page to confirm they meet your requirements before proceeding.
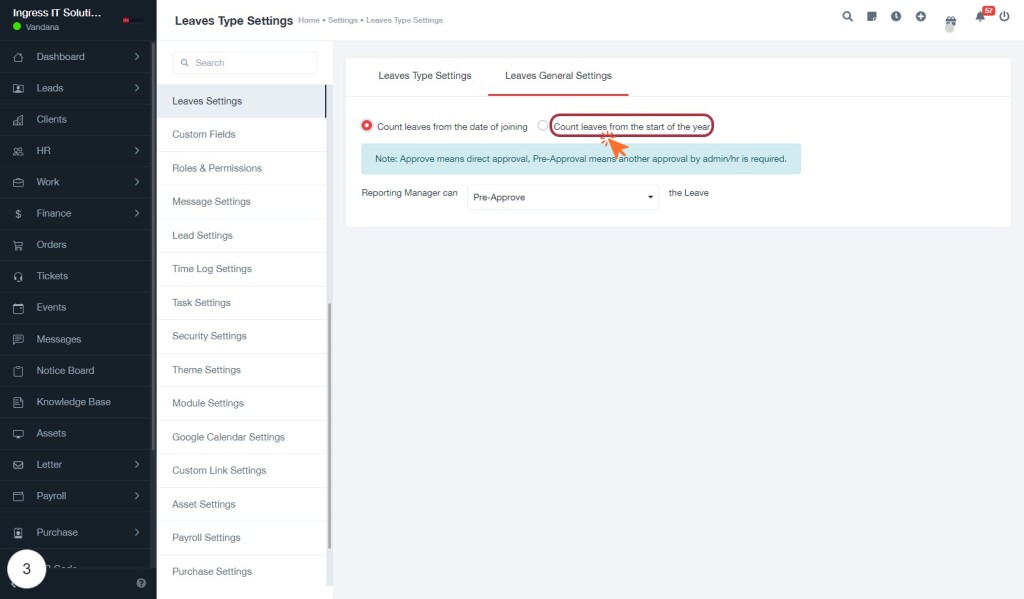
STEP 8: Select Reporting Manager Permissions
- Click on the "Reporting Manager can" dropdown to view available permissions.
- Options may include "Approve," "Pre-Approve," or other relevant roles.
- Choose the appropriate permission based on your organizational needs.
- Ensure to read any accompanying notes for clarification on each option.
- After making your selection, verify that the change aligns with your leave approval process.
- Save your settings to apply the changes effectively.
