BizCRM App
Creating and Managing Proposals
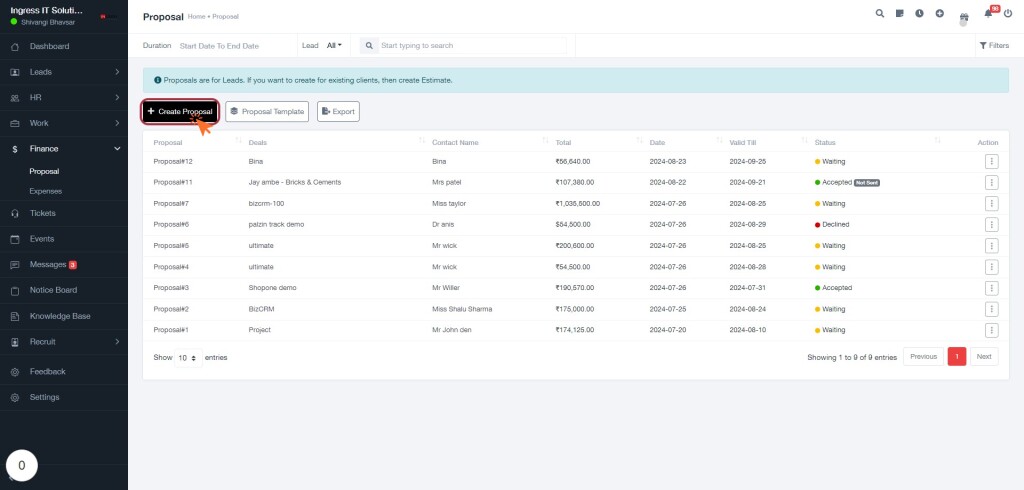
STEP 1: Click "Create Proposal" to Initiate Proposal Creation
- Navigate to the Proposal section of the application.
- Locate the Create Proposal button, which is prominently displayed in a black box.
- Click on the Create Proposal button to start the proposal creation process.
Once clicked, you will be directed to a new form where you can input essential details for your proposal.
- Proposal Title: Enter a descriptive title for your proposal.
- Client Information: Select a lead contact which you already added before.
- Proposal Details: Provide specifics about the services or products offered.
Ensure all fields are completed accurately before submitting your proposal.
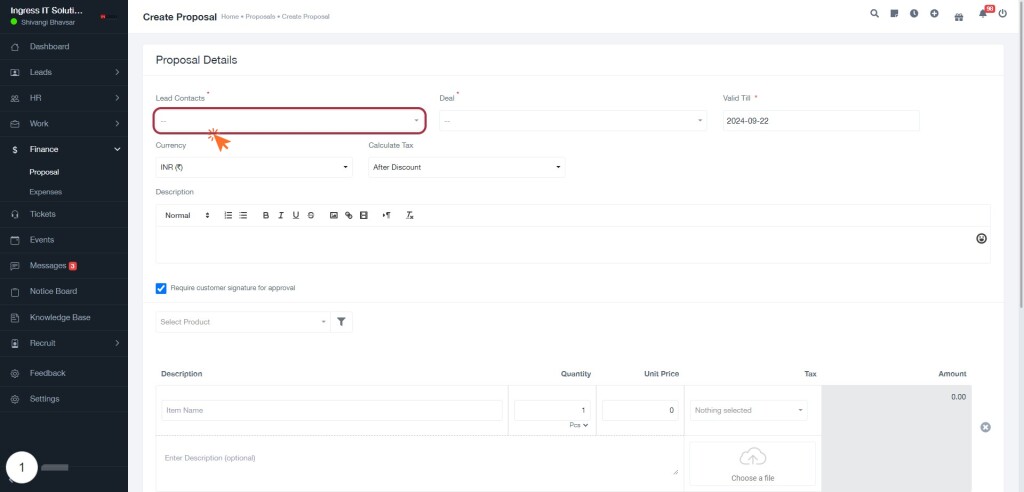
STEP 2: Select Lead Contacts from the Dropdown Menu
- Click on the dropdown labeled "Lead Contacts" to view available options.
- A list of contacts will appear; scroll through to find the desired contact.
- Click on the contact name to select it, which will populate the field.
- Ensure that the selected contact is correct before proceeding to the next step.
- If needed, you can also adjust the "Deal" field next to it by following the same selection process.
This will help you effectively manage your proposal details.
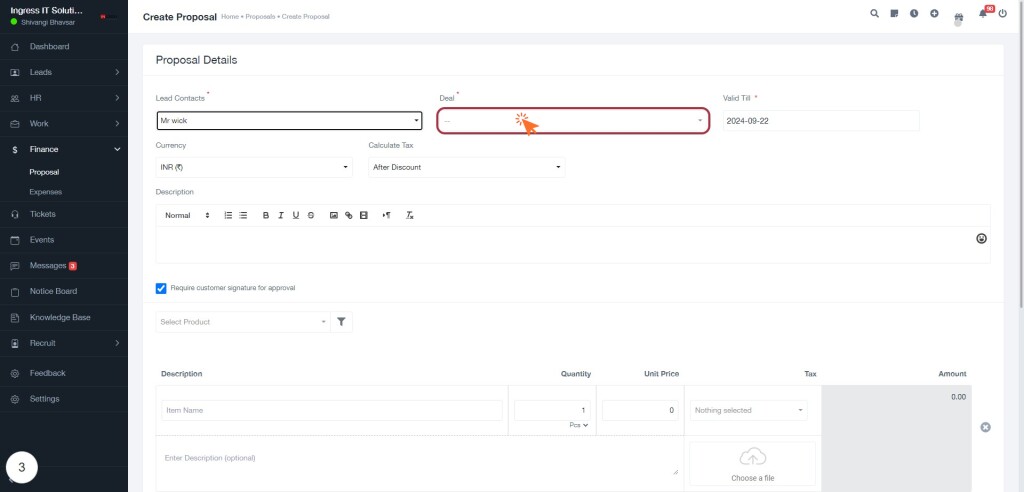
STEP 4: Select a Deal from the Dropdown Menu
- Locate the "Deal" input field in the proposal details section.
- Click on the dropdown menu.
- A list of available deals will appear. Scroll through the options to find the desired deal.
- Click on the specific deal you wish to select. This action will populate the field with your choice.
- Ensure that the selected deal aligns with the proposal details you are entering.
- If needed, review other fields such as "Calculate Tax" and "Clients" to ensure all information is accurate before proceeding.
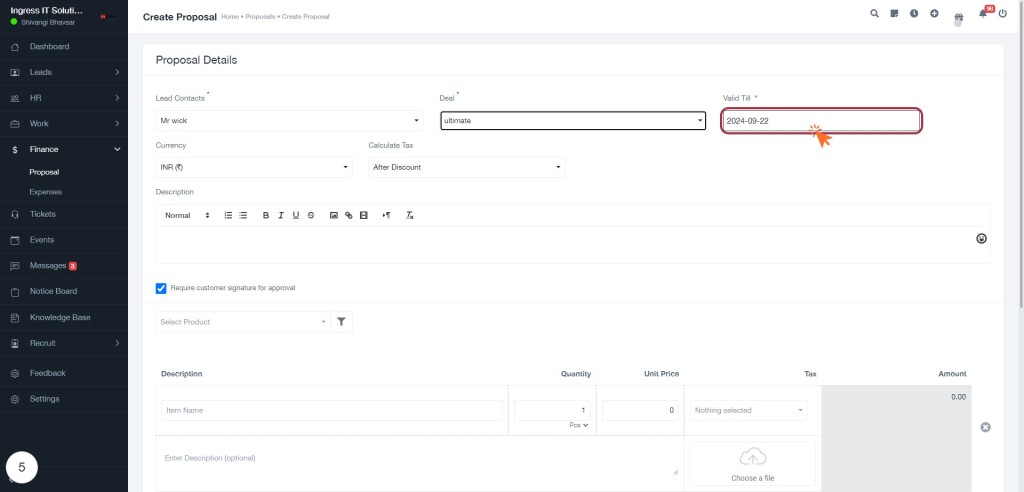
STEP 6: Enter Expiration Date in the Valid Till Field
- Locate the Valid Till input field on the form.
- Click inside the highlighted area (where the pointer is positioned) to activate the input.
- Select the desired expiration date in the format YYYY-MM-DD (e.g., 2024-09-22).
- Ensure the date is accurate to avoid any issues with validity.
- Review other nearby fields for additional information you may need to complete, such as related options or settings.
- After entering the date, proceed to the next step in the form to continue your process.
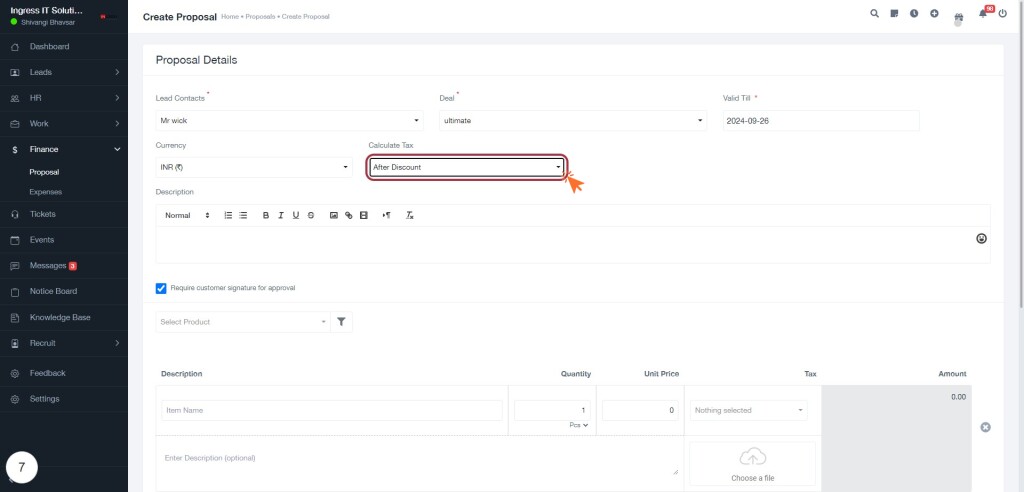
STEP 8: Select "After Discount" for Tax Calculation
- Click on the "Calculate Tax" dropdown menu within the Proposal Details section.
- From the options displayed, select "After Discount" to apply tax calculations based on the discounted amount.
- Ensure that the selection reflects your desired tax calculation method, as this will affect the final proposal amount.
- Review other nearby fields, such as "Lead Contacts" and "Currency," to confirm all details are accurate before proceeding.
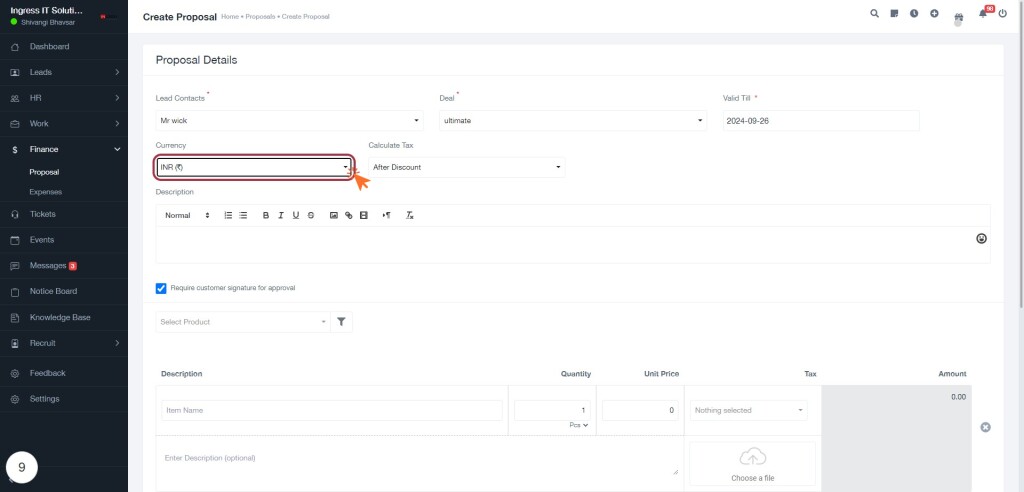
STEP 10: Select Currency Type for Proposal
- Click on the "INR (₹)" button to choose the currency for your proposal.
- This action will display a dropdown menu with additional currency options.
- Review the available currencies and select the one that best fits your proposal needs.
- Ensure that the selected currency aligns with your client's preferences and the nature of the transaction.
- After selecting, continue filling out the remaining fields in the proposal form to complete your entry.
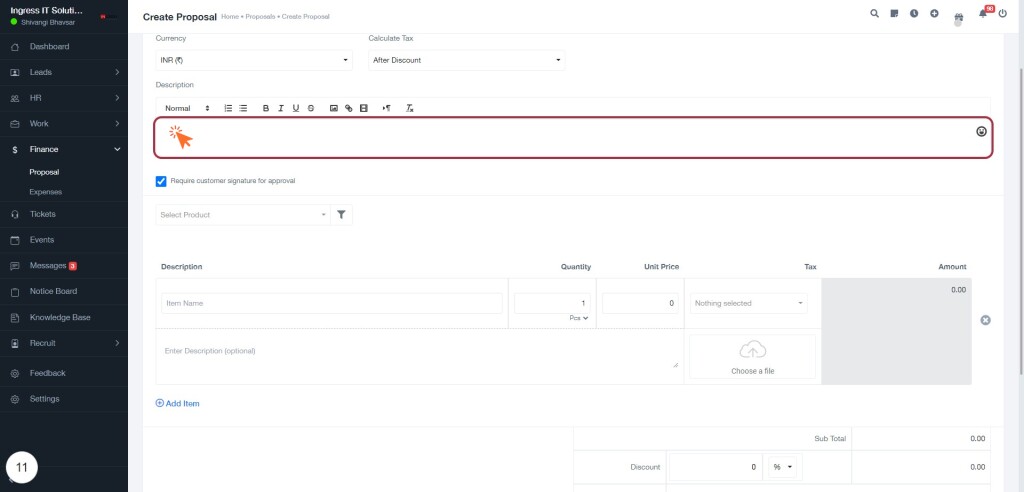
STEP 12: Click on the Input Field to Enter Proposal Details
- Locate the highlighted input field at the top of the form.
- Click inside the field to activate it, allowing you to enter the proposal title or relevant information.
- Ensure that the text formatting options above the field (Normal, B, I, etc.) are set according to your needs for styling the text.
- Below the input field, you can select a product from the dropdown menu, which may be relevant to your proposal.
- Fill in the description section with detailed information about the proposal, including item name and any additional descriptions as needed.
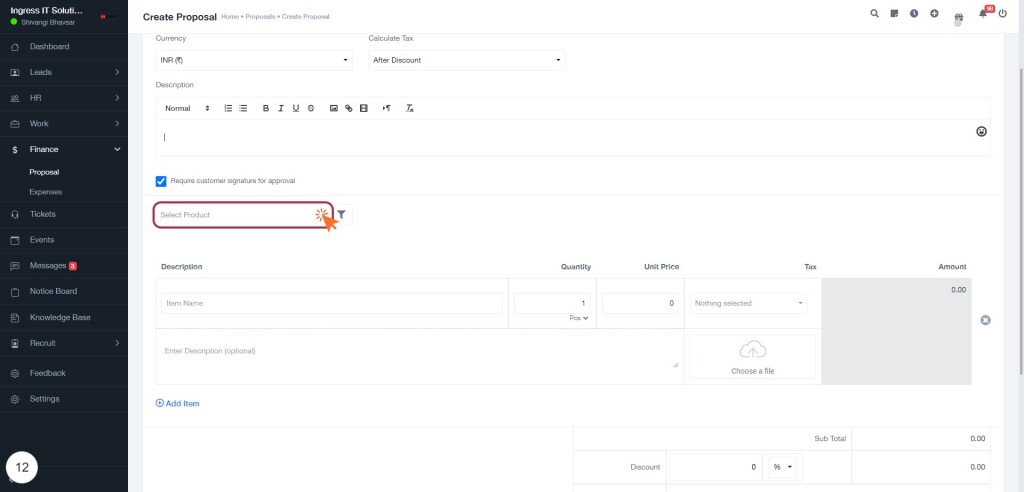
STEP 13: Select Product from Dropdown Menu
- Click on the "Select Product" button to open the dropdown menu.
- Browse through the list of available products. You can scroll if the list is long.
- Click on your desired product to select it. This will populate the selection field.
- Ensure the selected product is correct before proceeding to the next steps in your process.
- If needed, you can also add a description in the "Enter Description (optional)" field below for further clarification.
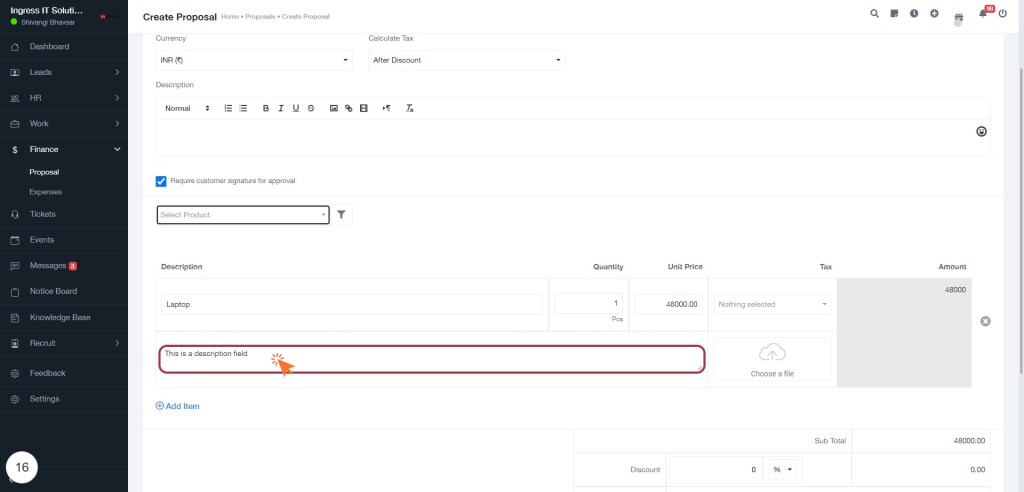
STEP 17: Click on the Description Field to Add Details
- Locate the highlighted area labeled "This is a description field."
- Click within this text area to activate it for editing.
- Enter relevant details about the item (e.g., specifications, features, or any additional information).
- Ensure your input is clear and concise to enhance understanding.
- After entering your description, review it for accuracy.
- If needed, utilize nearby options to add more items or save your changes.
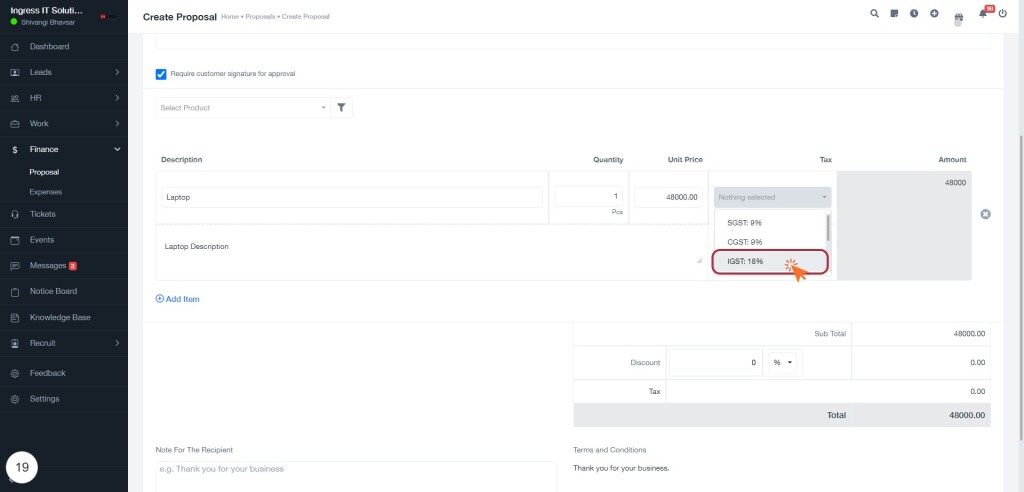
STEP 20: Select "IGST: 18%" from the Tax Options
- Locate the tax section in your form, where multiple tax options are displayed.
- Click on the highlighted option "IGST: 18%" to select it.
- This action will apply the Integrated Goods and Services Tax (IGST) at a rate of 18% to your transaction.
- Ensure that the selection reflects in the tax calculation area, updating the total accordingly.
- Review the subtotal and total amounts to confirm the correct tax has been applied.
By selecting IGST, you ensure compliance with applicable tax regulations for your transaction.
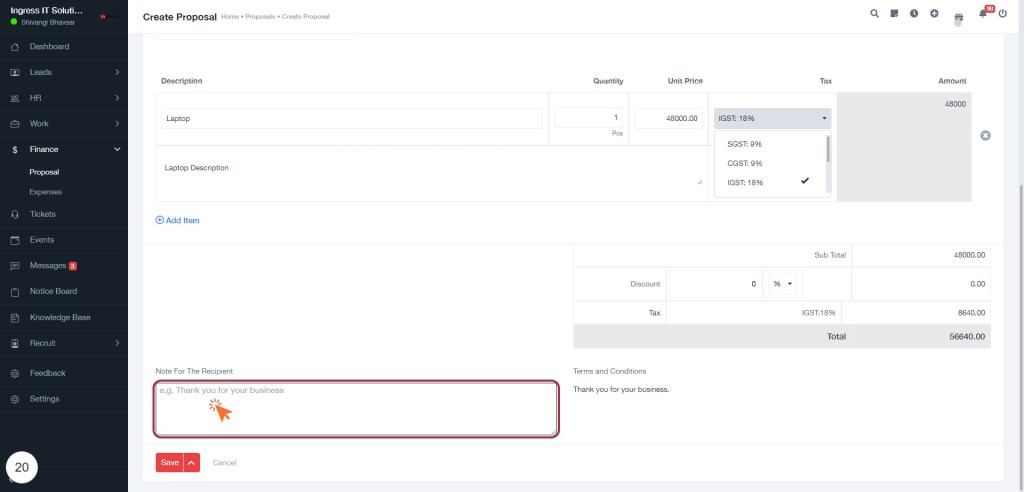
STEP 21: Enter Note for the Recipient
- Click on the highlighted text area labeled "Note For The Recipient."
- Type your personalized message. You can use the example provided (e.g., "Thank you for your business") as a reference.
- Ensure your note is clear and relevant to the recipient's context.
- Review your message for any errors before proceeding.
- Once satisfied, click the "Save" button below to store your note.
This step allows you to communicate effectively with the recipient, enhancing your engagement.
STEP 23: CLICK on "Save"
