BizCRM App
A Comprehensive Guide on Managing Deals and Agents Effectively in Your Sales Process
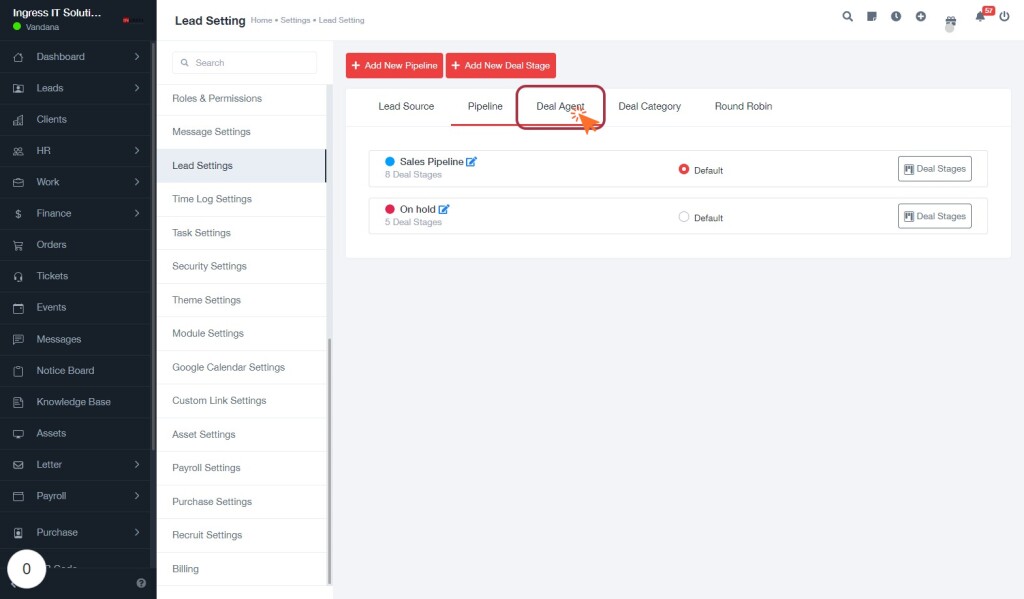
STEP 1: Select "Deal Agent" to Manage Deal Settings
- Click on the "Deal Agent" tab located in the card layout. This section allows you to manage various deal settings.
- Review the available options, including "Sales Pipeline" and "On hold," which display the number of deal stages associated with each.
- To add a new pipeline or deal stage, utilize the red buttons labeled "Add New Pipeline" and "Add New Deal Stage" above the card layout.
- Ensure to select the appropriate deal category or round robin settings as needed for your workflow.
This will help you effectively organize and manage your deals.
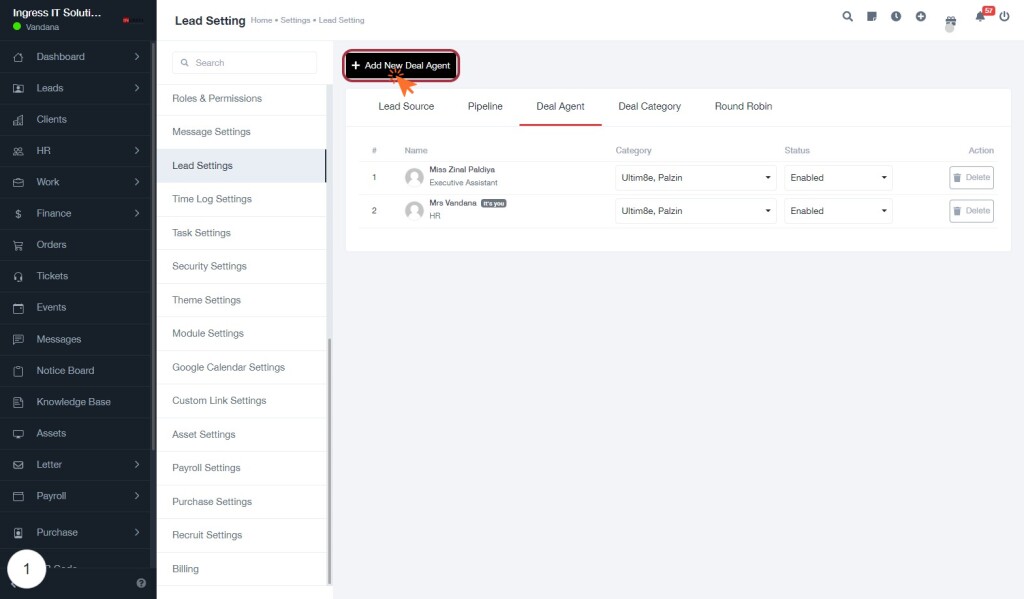
STEP 2: Click "Add New Deal Agent" to Create a New Agent
- Locate the "Add New Deal Agent" button on the right side of the screen.
- Click this button to initiate the process of adding a new deal agent.
- A form will appear, prompting you to enter the agent's details, such as name and category.
- Fill in the required fields accurately to ensure the new agent is added successfully.
- Review the information before submitting to avoid errors.
This action allows you to manage your deal agents effectively, enhancing your lead management process.
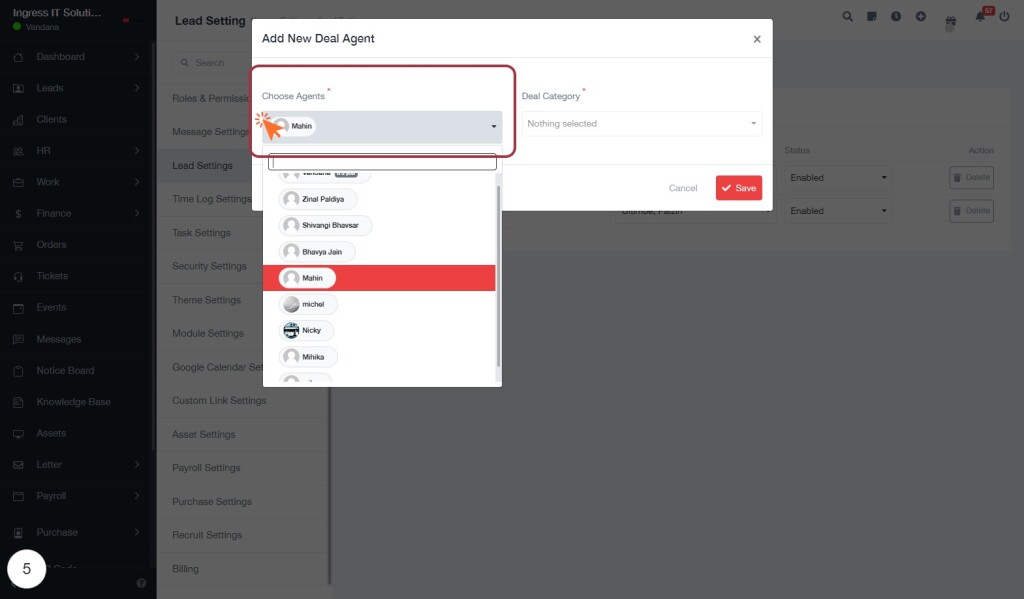
STEP 6: Select Agents from the Dropdown Menu
- Click on the "Choose Agents" dropdown to view a list of available agents.
- Scroll through the list or start typing the agent's name to filter options.
- Click on the desired agent's name (e.g., "Mahin") to select them.
- Ensure the selected agent is highlighted to confirm your choice.
- After selecting, proceed to fill in any additional required fields in the form.
This action allows you to assign the chosen agent to the deal effectively.
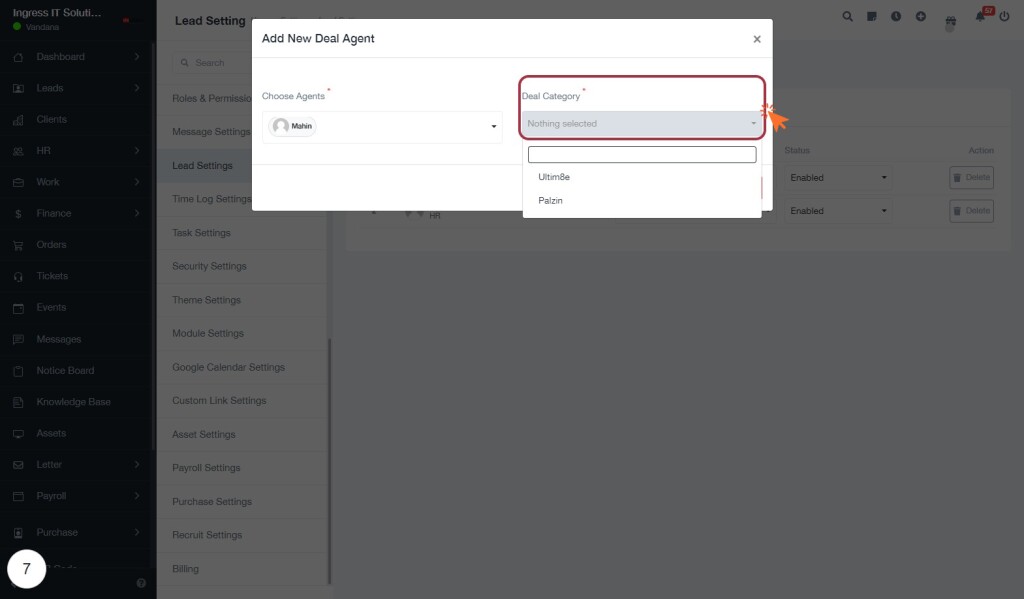
STEP 8: Select "Deal Category*"
- Click on the dropdown menu labeled "Deal Category*" to view available options.
- You will see choices. For this example you can see options such as "Ultim8e" and "Palzin."
- Select the appropriate category that fits your deal from the list.
- Ensure that you select a category, as it is marked with an asterisk (*) indicating it is a required field.
- After making your selection, proceed to fill out any additional required fields to complete the form.
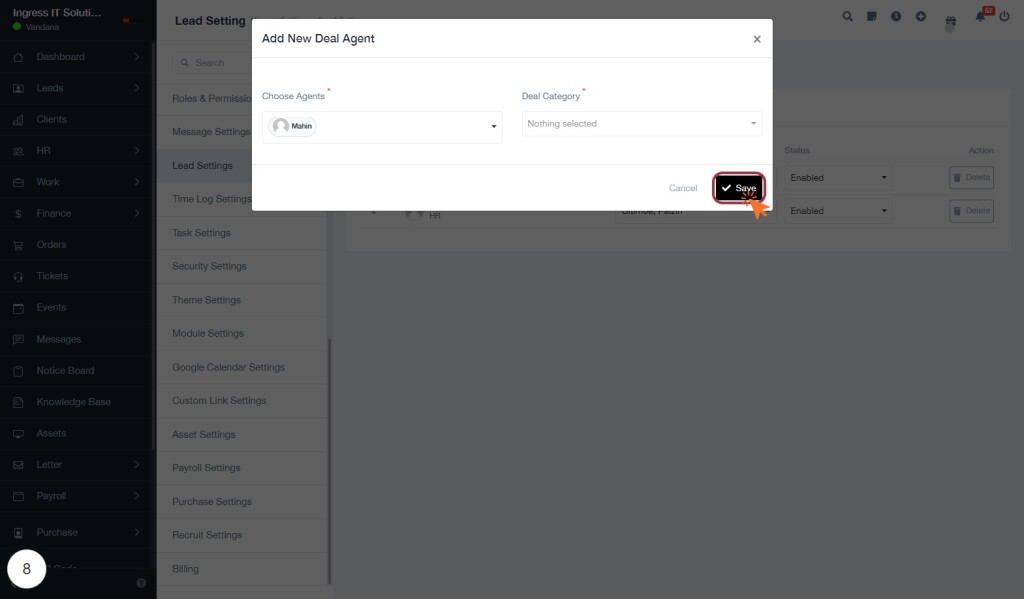
STEP 9: Click "Save" to Confirm Your Changes
- Ensure all required fields are filled out correctly, particularly the "Deal Category" dropdown.
- Review your selections to confirm accuracy before proceeding.
- Locate the "Save" button at the bottom right of the dialog box.
- Click the "Save" button to finalize your changes. A confirmation message may appear, indicating that your updates have been successfully saved.
- If you need to make additional changes, you can return to the form and edit the fields as necessary.
