BizCRM App
Step-by-Step Guide to Adding and Managing New Currencies in Your Interface
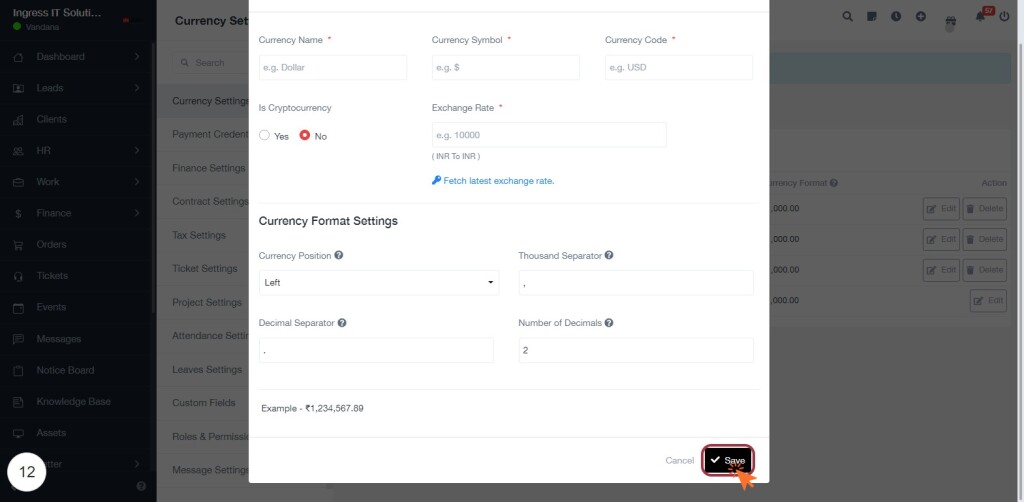
STEP 1: Click on "Currency Settings"
- Navigate to the "Currency Settings" section on the left sidebar.
- Click on the highlighted "Currency Settings" link to access the currency management interface.
- Review the current currencies listed, including their names, codes, exchange rates, and formats.
- Prepare to add a new currency by clicking on the "Add New Currency" button highlighted in red.
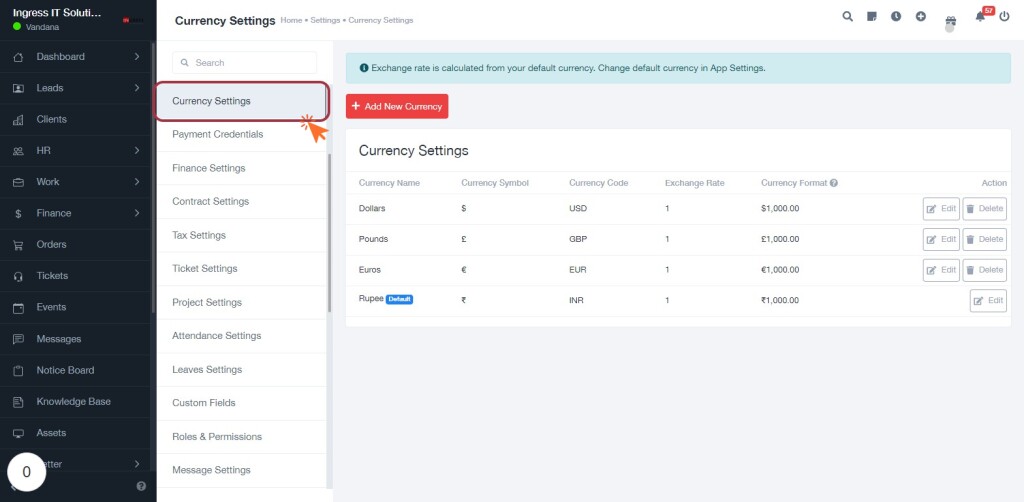
STEP 2: Click on "Add New Currency"
- Navigate to the Currency Settings section.
- Click on the Add New Currency button highlighted in red.
- This will open a form where you can enter details for the new currency.
- Required fields include:
- Currency Name*: Enter the name of the currency.
- Currency Code*: Specify the currency code (e.g., USD, EUR).
- Exchange Rate*: Input the exchange rate relative to your default currency.
- Ensure all mandatory fields marked with an asterisk (*) are filled before proceeding.
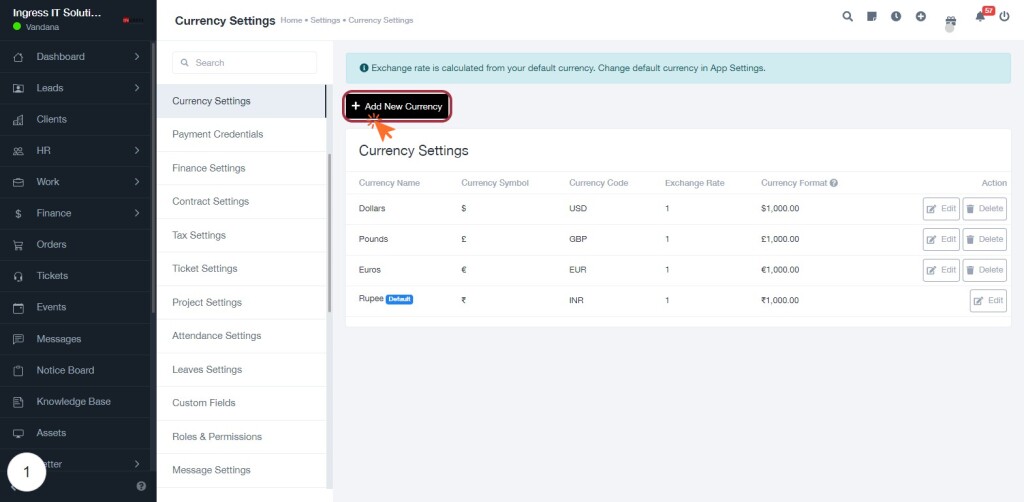
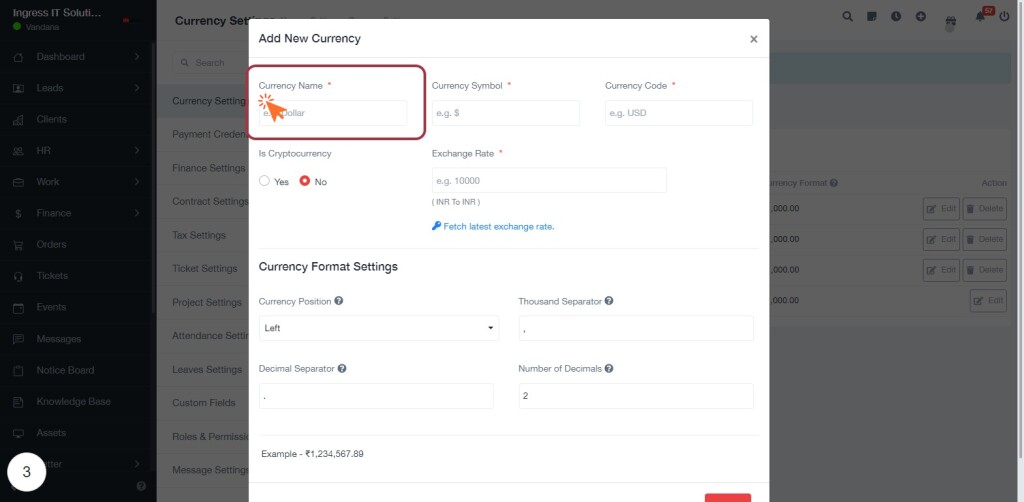
STEP 3: Click on "Currency Name *"
- Click on the "Currency Name *" field to enter the name of the new currency.
- Ensure the field is marked with an asterisk (*) indicating it is a required input.
- After clicking, type the desired currency name (e.g., Dollar).
- Proceed to fill in other required fields such as "Currency Code *" and "Currency Symbol."
- Review the highlighted area for additional settings related to currency format.
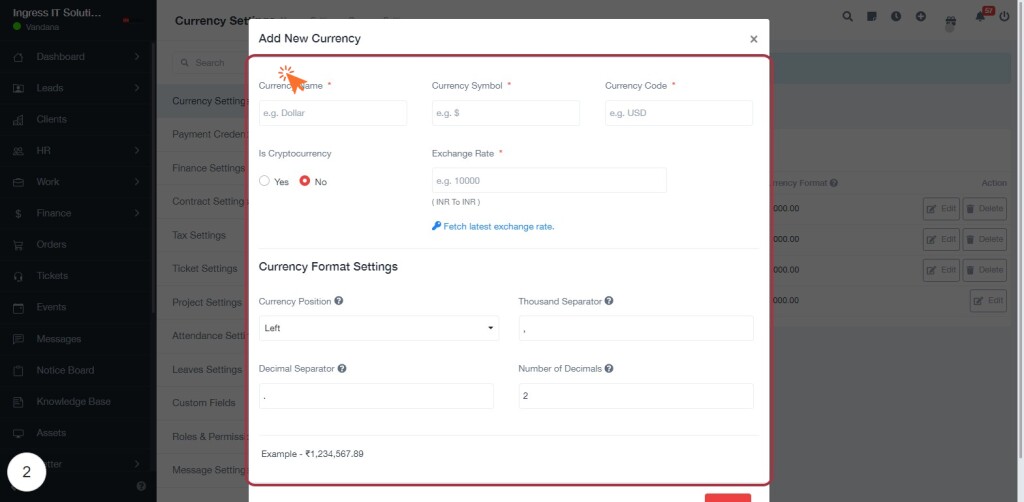
STEP 4: Click on "Currency Name *"
- Click on the "Currency Name *" field to enter the name of the currency you wish to add.
- Ensure that this field is filled as it is marked with an asterisk (*), indicating it is required.
- Proceed to fill in the "Currency Code *" and "Currency Symbol *" fields in the subsequent steps.
- Review the "Is Cryptocurrency?" option to specify if the currency is a cryptocurrency.
- Check the "Exchange Rate" field for fetching the latest rates if applicable.
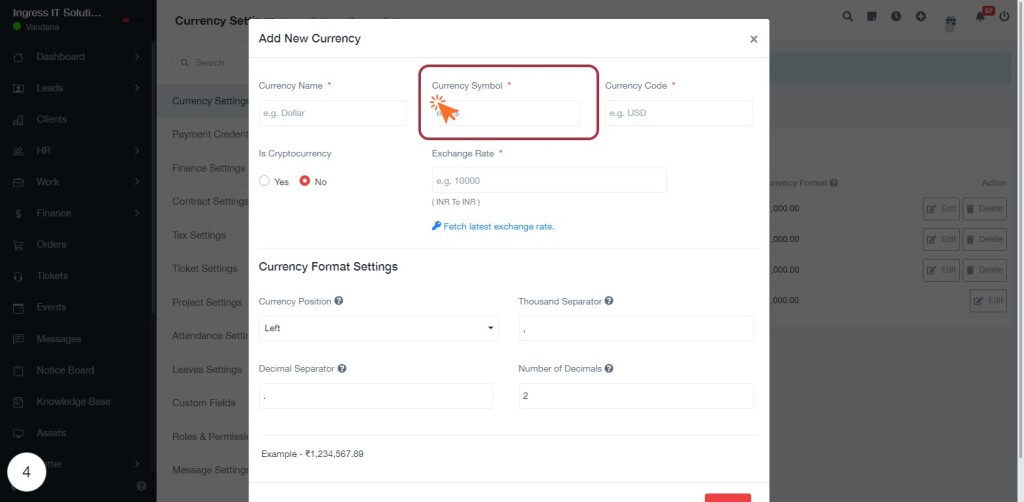
STEP 5: Click on "Currency Symbol *"
- Locate the "Currency Symbol *" field in the form.
- Click on the field to activate it.
- Enter the symbol for the currency you are adding (e.g., $, €, £).
- Ensure that this field is marked with an asterisk (*) indicating it is required.
- Proceed to the next step by clicking on "Currency Code *" after filling in the symbol.
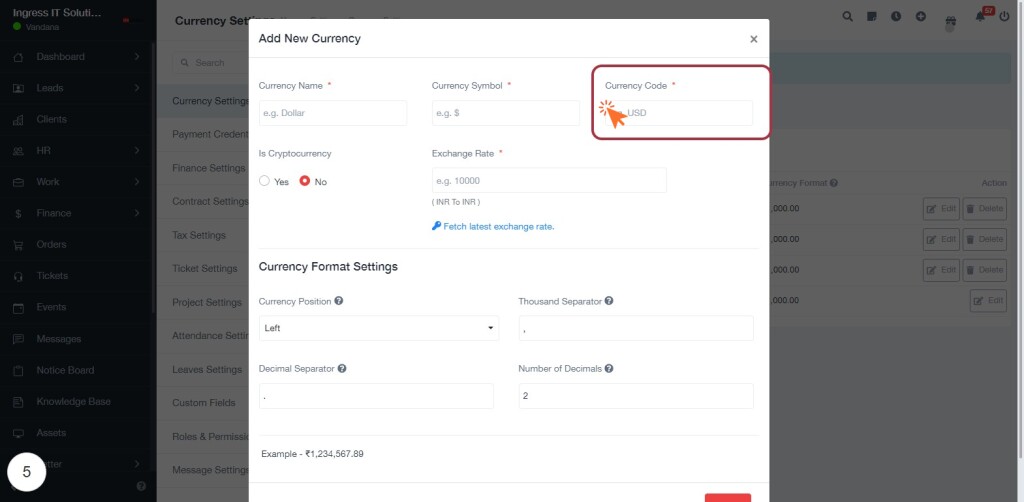
STEP 6: Click on "Currency Code *"
- Locate the "Currency Code *" field in the form.
- Click on the field to activate it.
- Enter the appropriate currency code (e.g., USD, EUR).
- Ensure the field is marked with an asterisk (*) indicating it is required.
- Review other related fields for additional information, such as "Currency Name" and "Currency Symbol."
- Proceed to the next step by clicking on "Is Cryptocurrency."
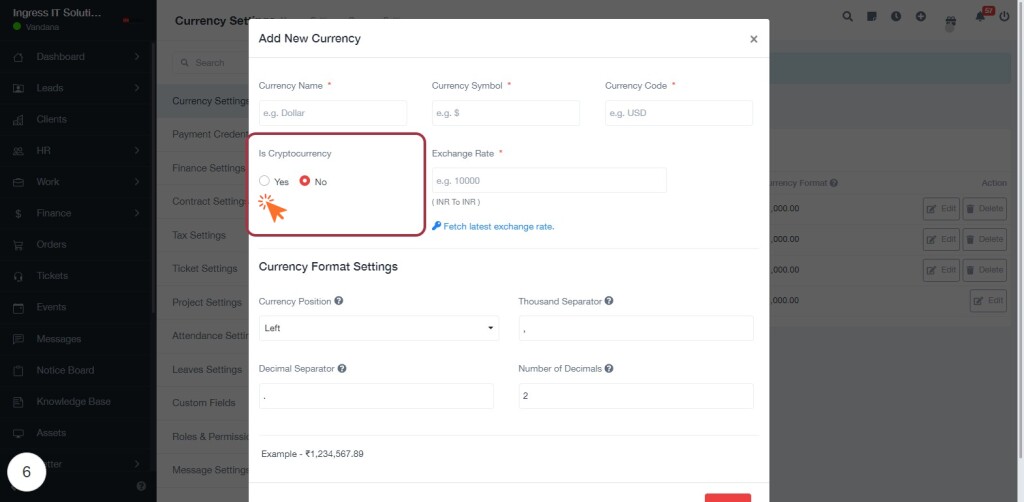
STEP 7: Click on "Is Cryptocurrency"
- Select either "Yes" or "No" for the "Is Cryptocurrency" option.
- Ensure that you have filled in the required fields marked with an asterisk (*).
- Review any additional settings for currency format below this section.
- After making your selection, proceed to the next step by clicking on "Exchange Rate *".
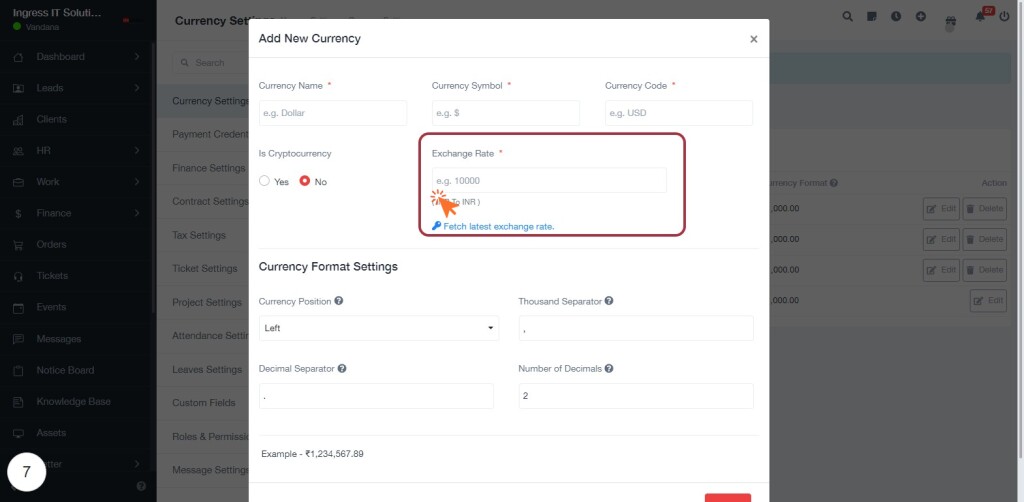
STEP 8: Click on "Exchange Rate *"
- Locate the "Exchange Rate *" field in the form.
- Click on the field to enter the exchange rate for the currency.
- You can also click the "Fetch latest exchange rates" link to automatically retrieve the current exchange rate.
- Ensure that the field is filled in as it is marked with an asterisk (*) indicating it is required.
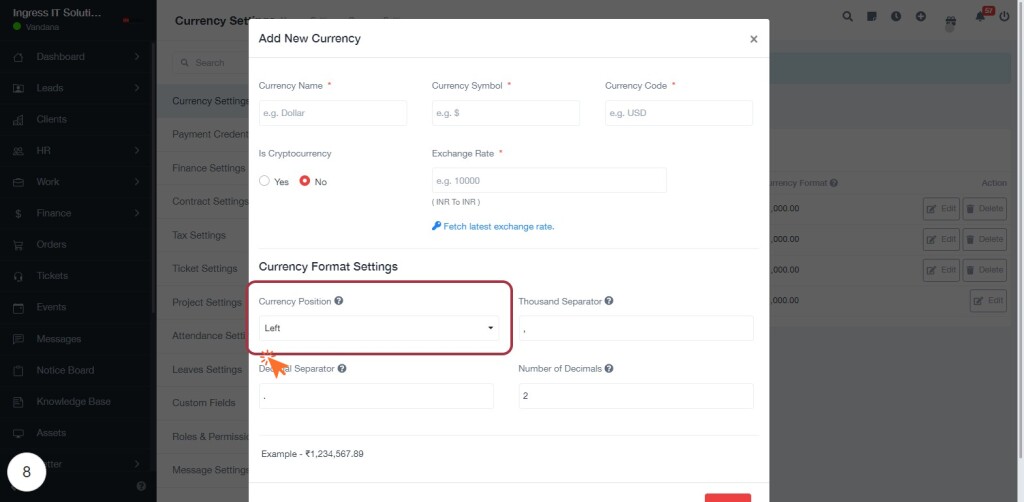
STEP 9: Click on "Currency Position"
- In the "Add New Currency" form, locate the Currency Position dropdown.
- Click on the dropdown to reveal options for positioning the currency.
- Select your preferred position (e.g., Left, Right) for the currency symbol.
- Ensure all required fields marked with an asterisk (*) are filled out before proceeding.
- After selecting, continue to the next step by clicking on Thousand Separator.
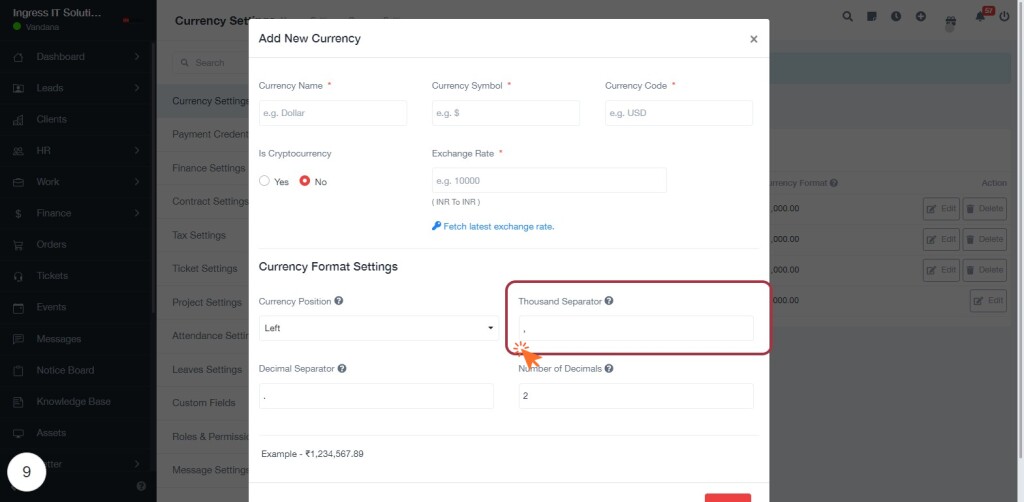
STEP 10: Click on "Thousand Separator"
- In the "Currency Format Settings" section, locate the "Thousand Separator" field.
- Click on the highlighted area to enter the desired separator (e.g., comma, period).
- Ensure that the separator aligns with your currency formatting preferences.
- This setting will affect how large numbers are displayed in your currency format.
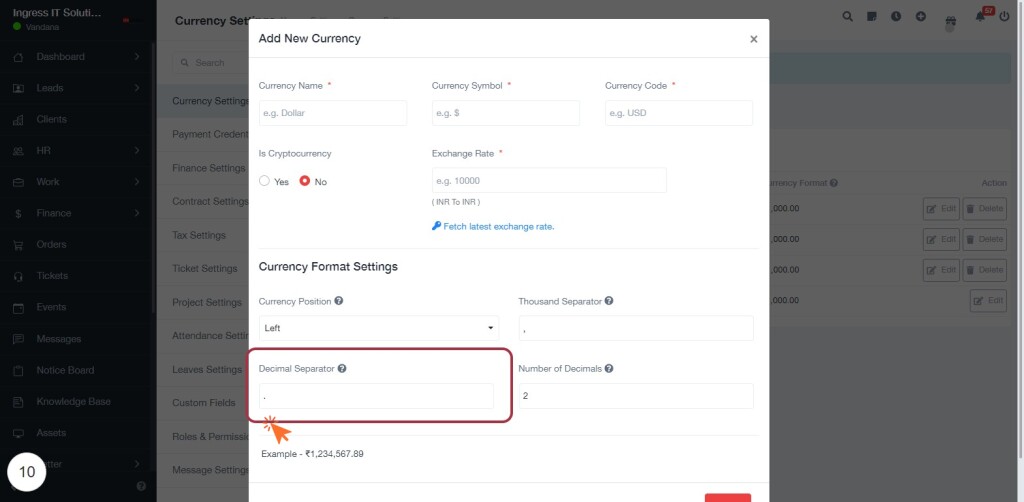
STEP 11: Click on "Decimal Separator"
- Locate the "Decimal Separator" field in the Currency Format Settings section.
- Click on the highlighted area to activate the input for the decimal separator.
- Enter the character you wish to use as the decimal separator (e.g., a period or comma).
- Ensure that the input is clear and matches your desired currency format.
- Review the example provided to confirm the correct format before proceeding.
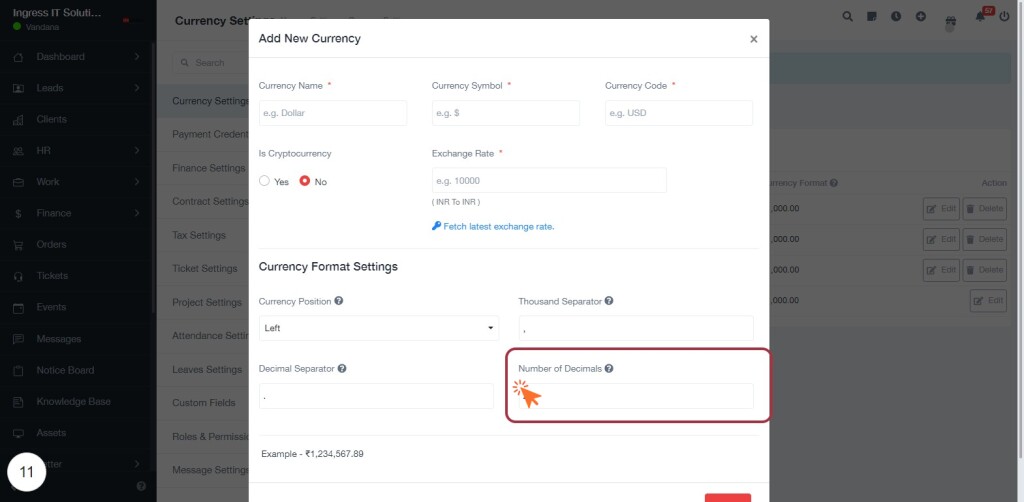
STEP 12: Click on "Number of Decimals"
- Locate the "Number of Decimals" field within the "Add New Currency" form.
- Click on the highlighted area to activate the input field.
- Enter the desired number of decimal places for the currency format.
- Ensure that the input meets any specified requirements (e.g., numeric values).
- Proceed to the next step by clicking on "Save" to finalize your currency settings.
STEP 13: Click on "Save" to Finalize Currency Settings
- Ensure all required fields are filled, including:
- Currency Name (marked with *)
- Currency Code (marked with *)
- Currency Position (optional)
- Decimal Separator (optional)
- Thousand Separator (optional)
- Number of Decimals (optional)
- Review your entries for accuracy.
- Click the Save button to finalize your currency settings.
