BizCRM App
Step-by-Step Guide: Configuring Units and Invoice Settings in the Finance Section
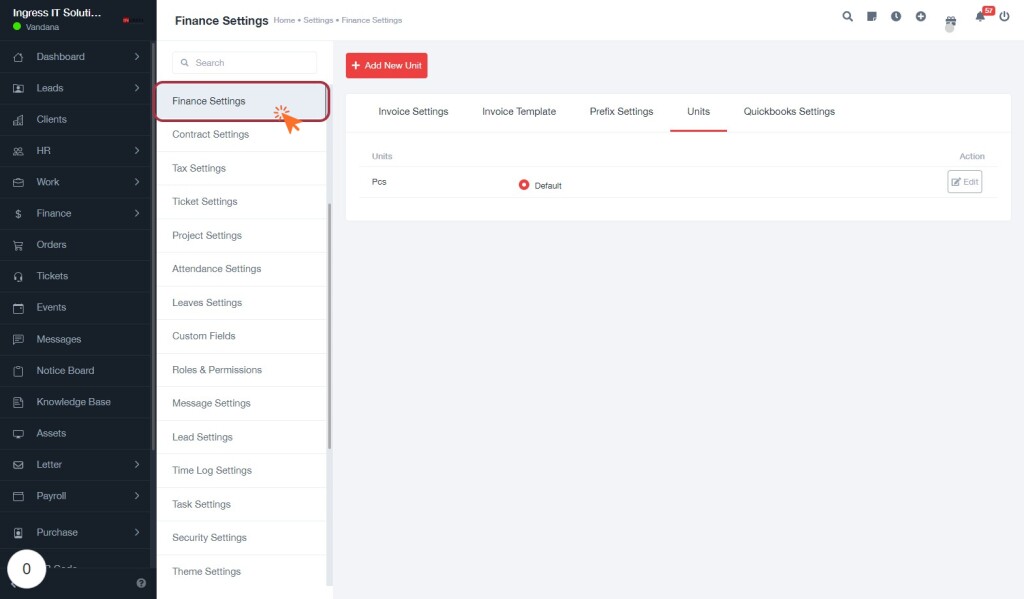
STEP 1: Click on "Finance Settings" to Access Financial Options
- Navigate to Finance Settings in the sidebar menu.
- This section allows you to manage various financial configurations.
- Look for the Units tab, which will be your next focus.
- Ensure to explore other settings like Invoice Settings and Invoice Template for comprehensive management.
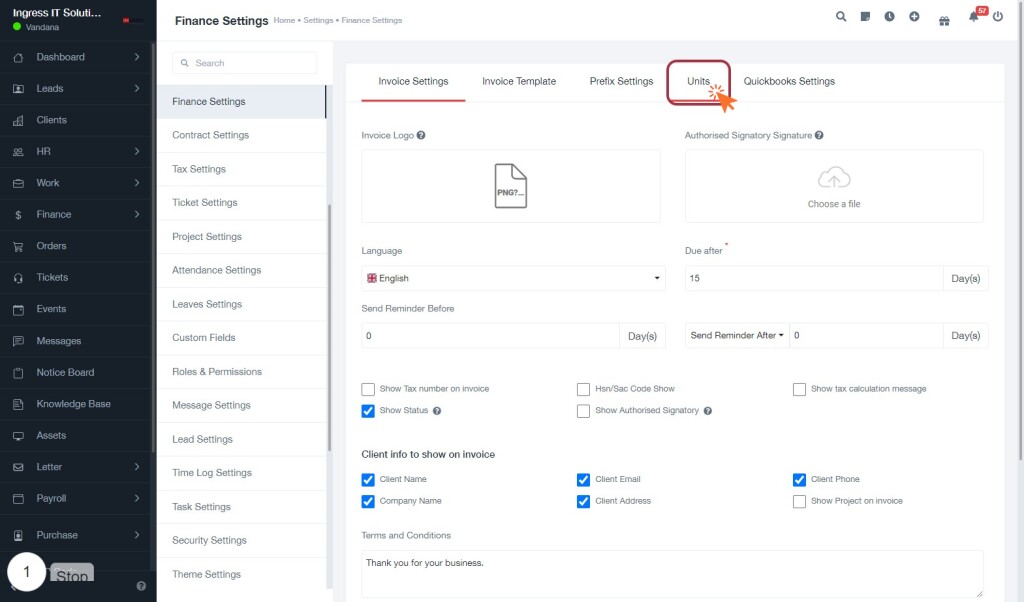
STEP 2: Click on "Units" Tab
- Navigate to the "Finance Settings" section.
- Click on the "Units" tab to access unit settings.
- Ensure you review the highlighted area for relevant options regarding unit management.
- Look for any required fields marked with an asterisk (*) to complete your settings.
- Prepare to proceed by clicking on "Add New Unit" in the next step.
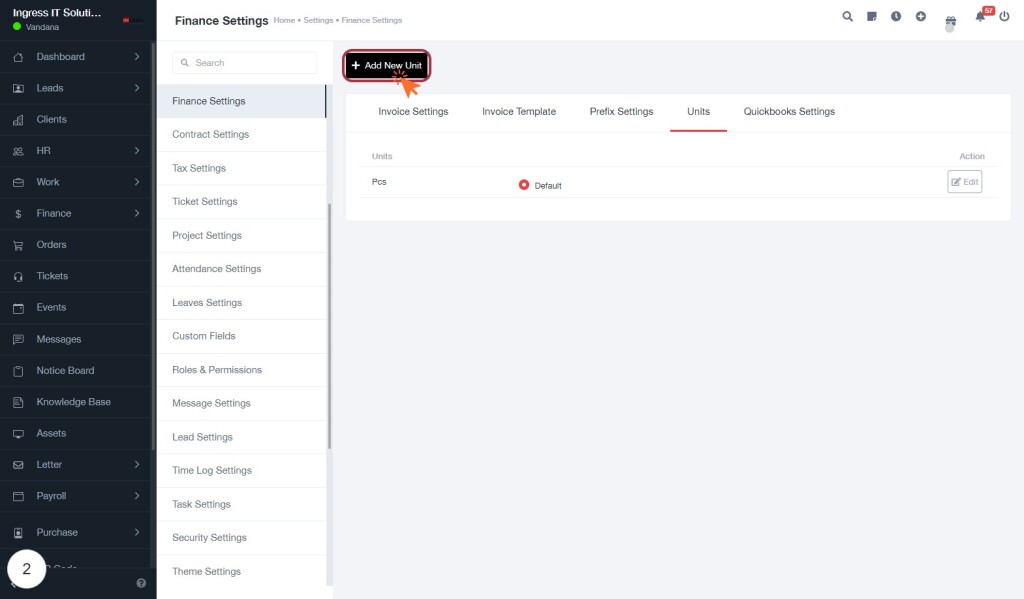
STEP 3: Click on "Add New Unit"
- Locate the "Add New Unit" button highlighted in the interface.
- Click on the button to initiate the process of adding a new unit.
- Ensure you are on the Units tab under Finance Settings.
- After clicking, proceed to the next step to Enter Unit Type.
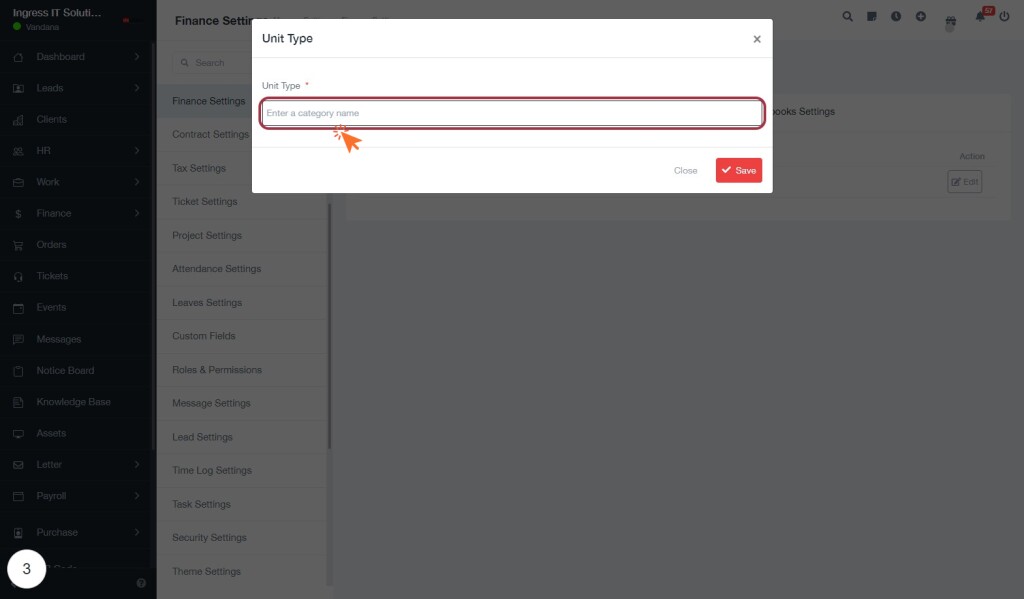
STEP 4: Enter Unit Type
- Click on the Unit Type input field highlighted in red.
- Enter a category name as required (indicated by the asterisk * next to the label).
- Ensure the information is accurate before proceeding.
- After entering the unit type, you will move to the next step to save your changes.
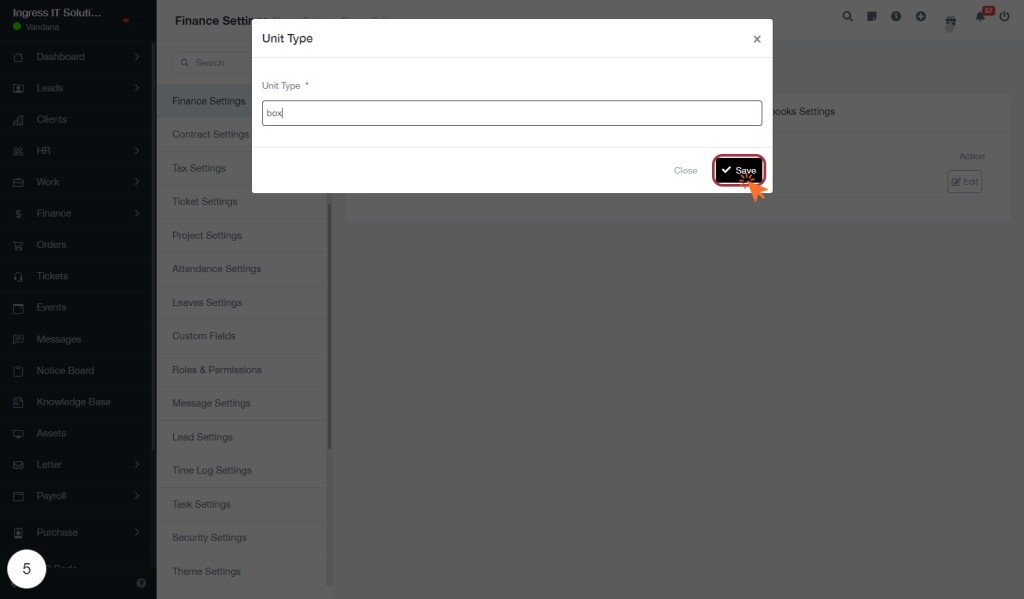
STEP 6: Click on "Save" to Confirm Unit Type
- Ensure the "Unit Type" field is filled out.
- Locate the "Save" button at the bottom right of the dialog box.
- Click on the "Save" button to confirm your entry.
- This action will save the unit type you have entered and proceed to the next step.
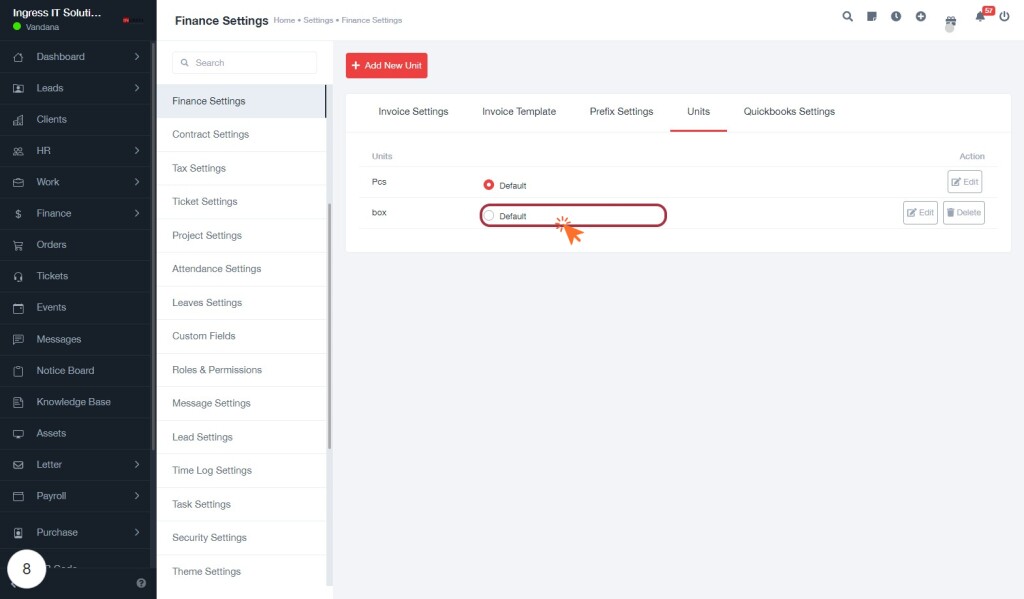
STEP 9: Click on Default Unit to Set It
- Locate the "Units" section in the Finance Settings.
- Identify the unit labeled "Default" in the list.
- Click on the highlighted area next to "Default" to set it as your default unit.
- Ensure that the selected unit reflects your desired default for future transactions.
- Review any additional settings or confirmations that may appear after selection.