BizCRM App
Step-by-Step Guide to Configuring Client Sign-Up Settings in Your Application
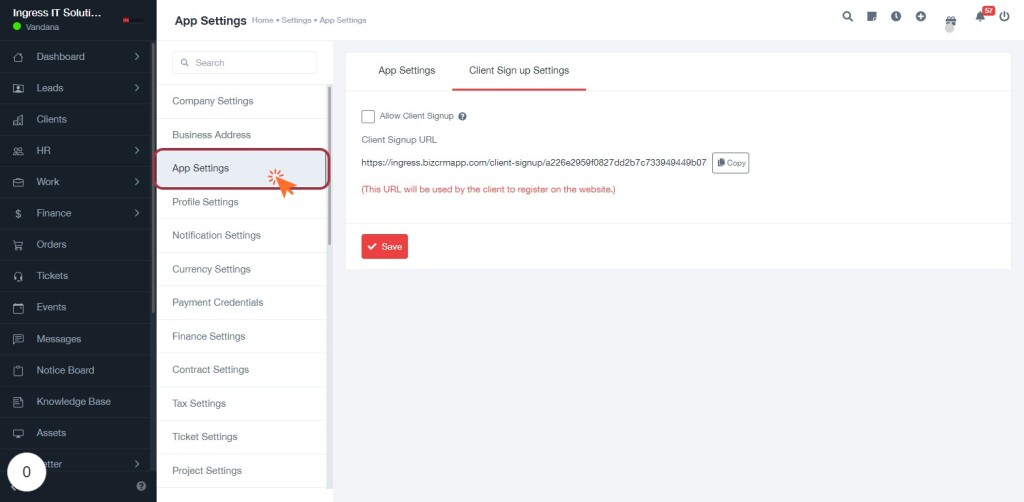
STEP 1: Click on "App Settings" to Access Application Configuration
- Navigate to the App Settings section in the sidebar.
- Click on the App Settings link to view the application configuration options.
- Review the Client Sign up Settings area, which includes:
- Allow Client Signup checkbox.
- Client Signup URL for client registration.
- Ensure to save any changes made in this section.
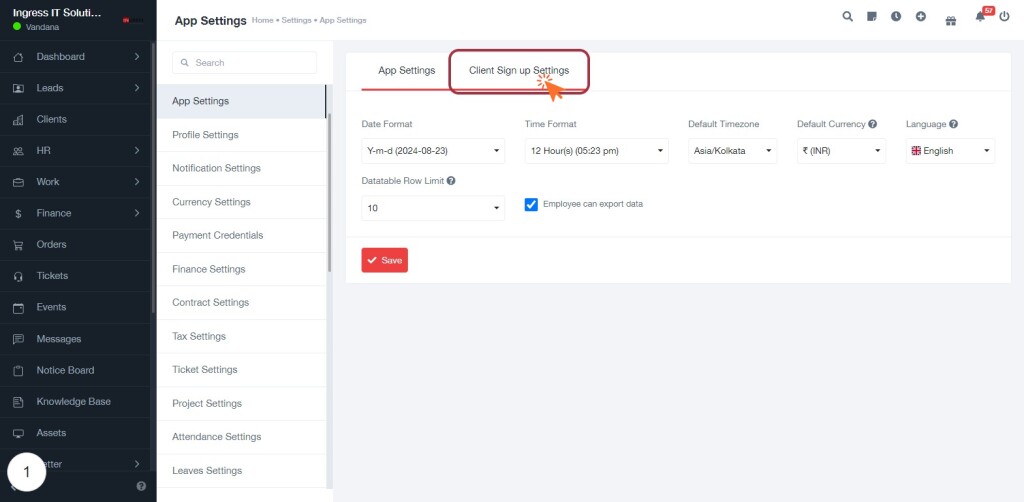
STEP 2: Click on "Client Sign up Settings" Tab
- Navigate to the App Settings section.
- Click on the Client Sign up Settings tab to access the relevant configuration options.
- Ensure you review the following input fields:
- Date Format: Select your preferred date format.
- Time Format: Choose between 12-hour or 24-hour format.
- Default Timezone: Set the timezone according to your preference.
- Default Currency: Specify the currency for transactions.
- Language: Select the desired language for the application.
- After making the necessary selections, proceed to the next step by clicking on "Allow Client Signup."
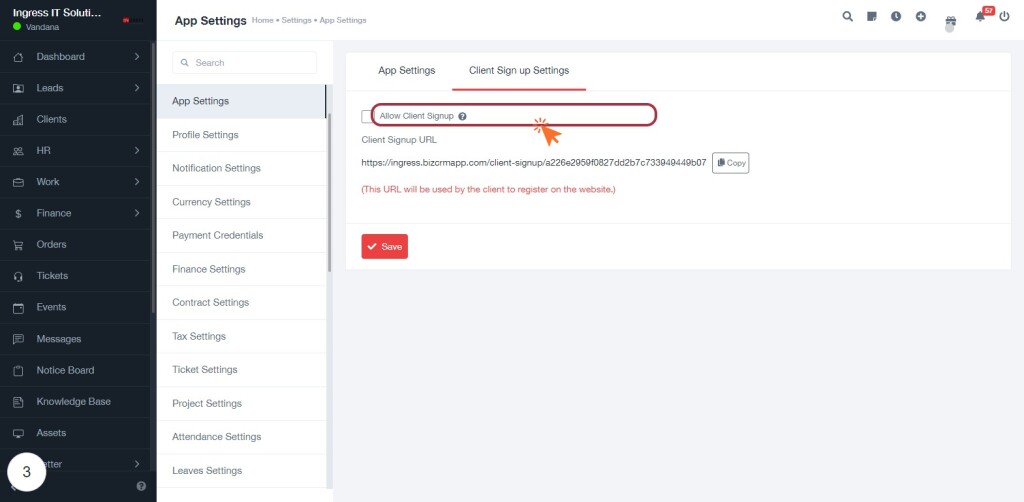
STEP 4: Click on "Allow Client Signup"
- Locate the "Allow Client Signup" label in the Client Sign up Settings section.
- Click on the input field associated with this label to enable client sign-ups.
- Ensure the field is highlighted, indicating it's ready for input.
- Optionally, provide the Client Signup URL in the adjacent field for client registration.
- After making changes, remember to click the "Save" button to apply your settings.
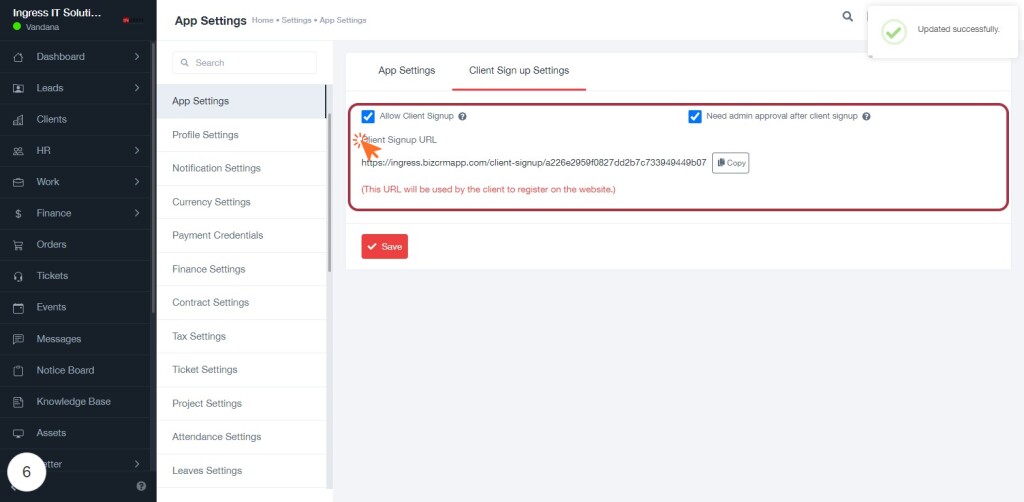
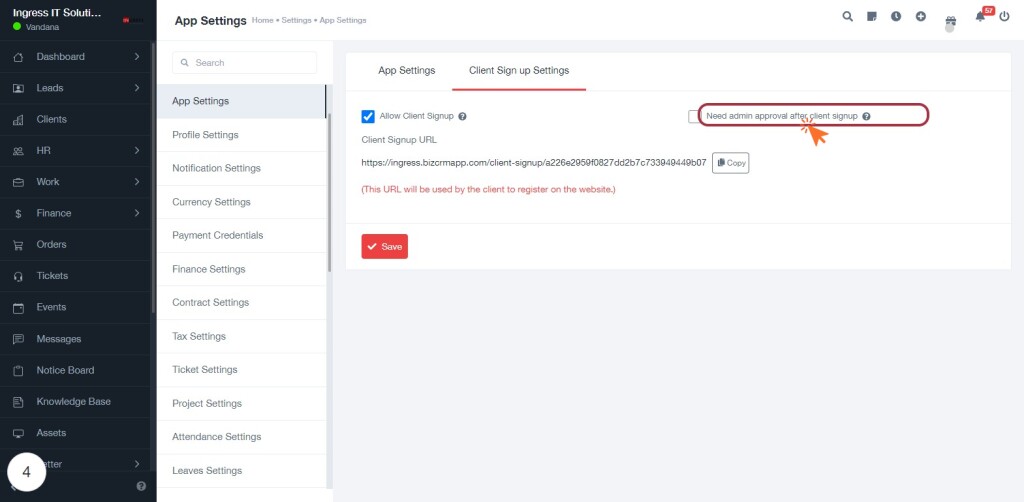
STEP 5: Click on "Need admin approval after client signup"
- Navigate to the Client Sign up Settings section.
- Locate the label "Need admin approval after client signup."
- Click on this option to enable the requirement for admin approval after client sign-up.
- Ensure that the setting is highlighted to confirm your selection.
- Proceed to the next step by clicking on "Save" to confirm your settings.
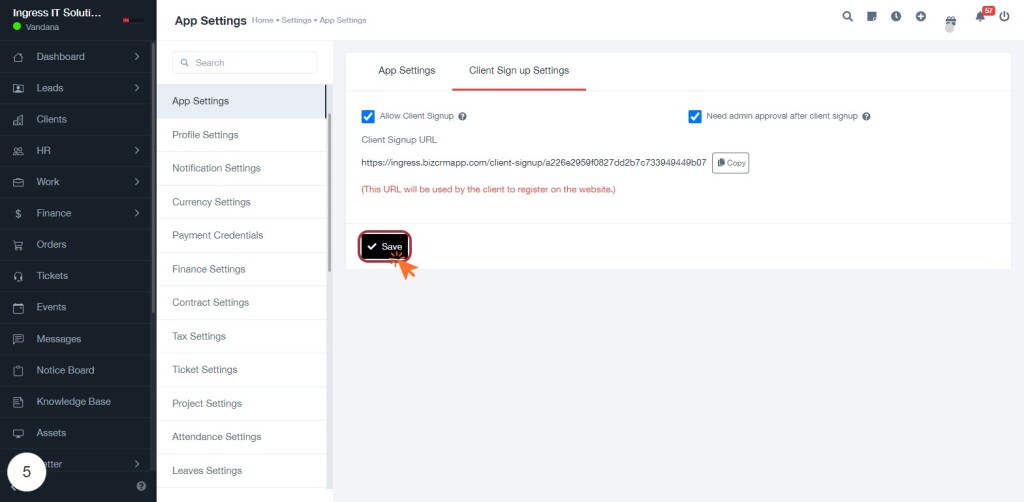
STEP 6: Click on "Save" to Confirm Settings
- Ensure all required fields are filled in the Client Sign-up Settings.
- Review the options: "Allow Client Signup" and "Need admin approval after client signup."
- Click the Save button to confirm your settings.
- Verify that the changes are saved successfully before proceeding to the next step.
STEP 7: Click on "Allow Client Signup"
- Ensure the "Allow Client Signup" checkbox is selected.
- Review the "Client Signup URL" provided below the checkbox.
- If needed, click the "Copy" button to copy the URL for client registration.
- Make sure to check the option for "Need admin approval after client signup" if applicable.
- After confirming all settings, click "Save" to finalize changes.