BizCRM App
Step-by-Step Guide to Submitting a Leave Request on BizCRMApp.com
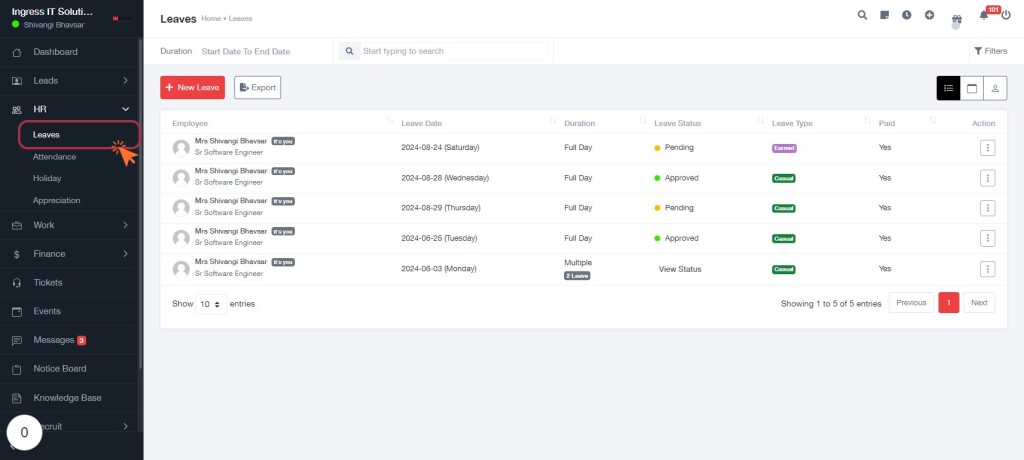
STEP 1: Click on "Leaves" to Access Leave Management
- Navigate to bizcrmapp.com.
- Click on the Leaves option in the sidebar to view the leave management section.
- In the Leaves section, you will see a table listing employees' leave requests, including details like Employee, Leave Date, Duration, Leave Status, Leave Type, and Paid status.
- Prepare to click on New Leave for adding a new leave request in the next step.
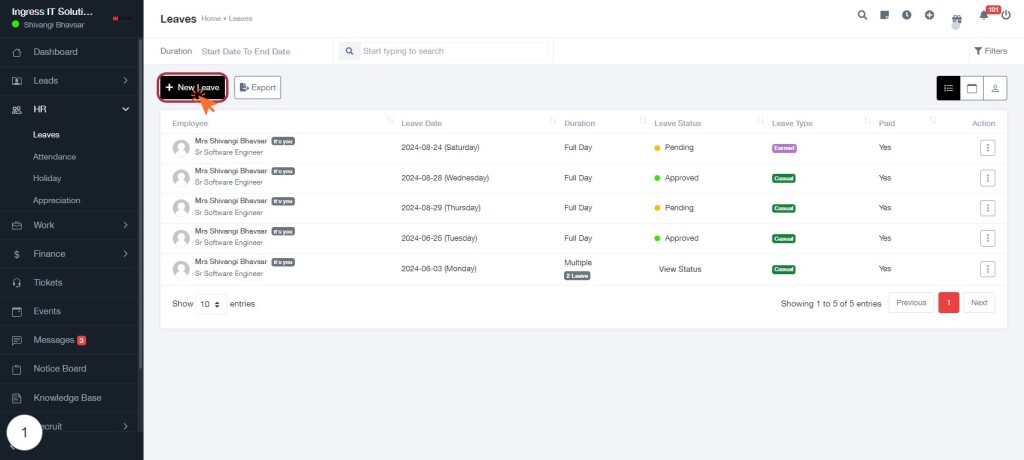
STEP 2: Click on "New Leave"
- Navigate to the "Leaves" section.
- Click on the New Leave button highlighted in red.
- This action will open a form for entering leave details.
- Ensure to fill in all required fields marked with an asterisk (*).
- Review the leave types available for selection.
- After completing the form, proceed to the next step to fill in the necessary information.
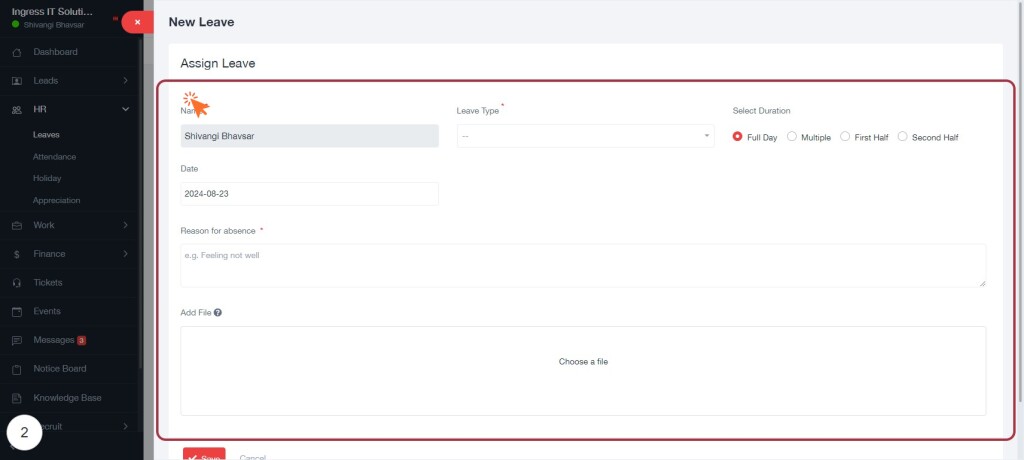
STEP 3: Fill Name and Leave Details
- Enter your Name in the designated field (marked with * for required).
- Select Leave Type from the dropdown menu.
- Choose the Date for the leave.
- Provide Reason for Absence (required).
- Select Duration: Full Day, Multiple, First Half, or Second Half.
- Add File if necessary by clicking "Choose a file".
Ensure all required fields are filled before proceeding to the next step.
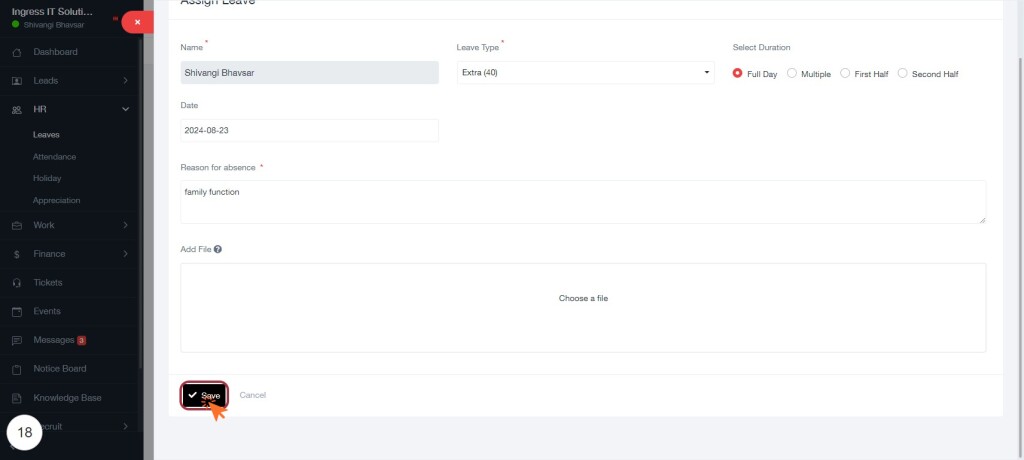
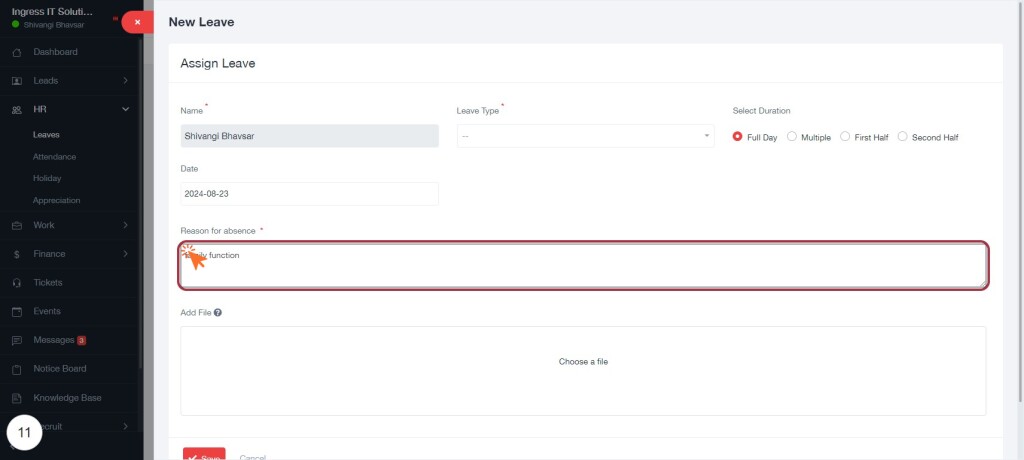
STEP 11: Enter Reason for Absence
- Locate the Reason for absence textarea in the form.
- Enter a brief description of your absence, such as "family function."
- Ensure that all required fields marked with an asterisk (*) are filled out.
- Review your input for accuracy before proceeding.
- Once completed, you can move to the next step by clicking on the Save button.
STEP 19: Click on "Save" to Submit Leave Request
- Ensure all required fields are filled: Name, Date, Reason for Absence.
- Review the selected Leave Type and Duration.
- Click the Save button at the bottom of the form to submit your leave request.
- If needed, attach any relevant files before saving.
- Confirm that the submission is successful and check for any error messages.
