BizCRM App
Step-by-Step Guide to Customizing Module Settings for Optimal Workflow Efficiency
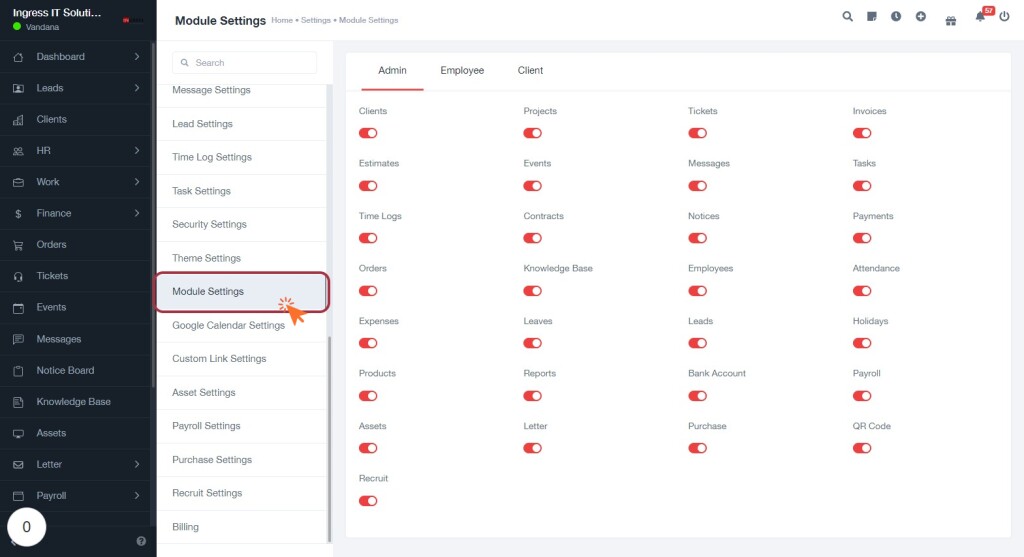
STEP 1: Click on "Module Settings" to Access Configuration Options
- Navigate to the left sidebar of your screen.
- Locate and click on the "Module Settings" option highlighted in the menu. This will open the configuration panel for various modules.
- In this section, you can manage settings for different modules, such as enabling or disabling features relevant to your workflow.
- Review the available options to customize your experience, ensuring that the modules you need are activated for optimal functionality.
For further assistance, explore adjacent settings that may enhance your module configurations.
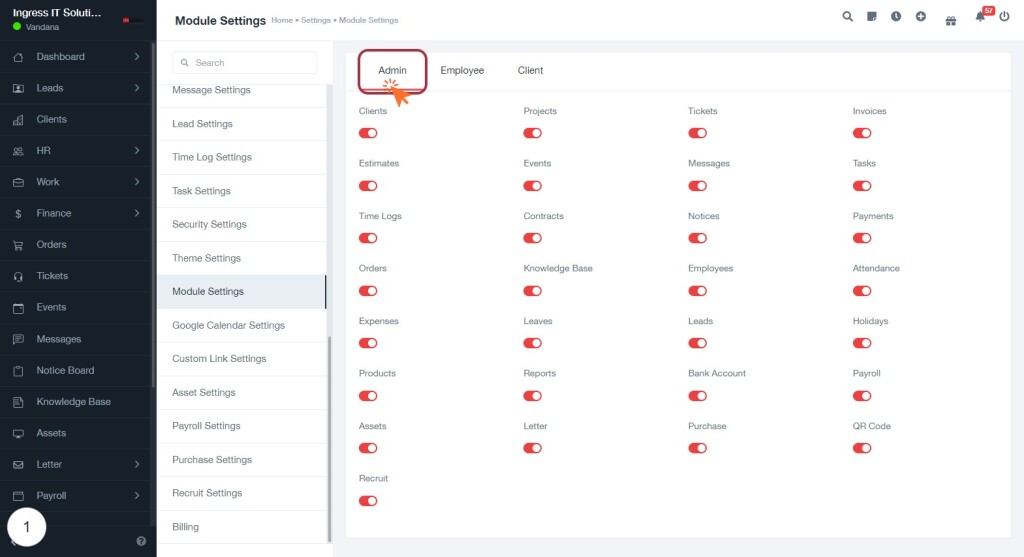
STEP 2: Click on the "Admin" Tab to Access Module Settings
- Locate the "Admin" tab at the top of the settings section.
- Click on the "Admin" tab to reveal various configuration options related to administrative settings.
- In this section, you can manage settings for:
- Clients: Toggle settings related to client management.
- Estimates: Adjust options for estimate generation.
- Time Logs: Control time tracking features.
- Orders: Manage order settings.
- Expenses: Configure expense tracking.
- Review each option carefully to customize your administrative settings effectively.
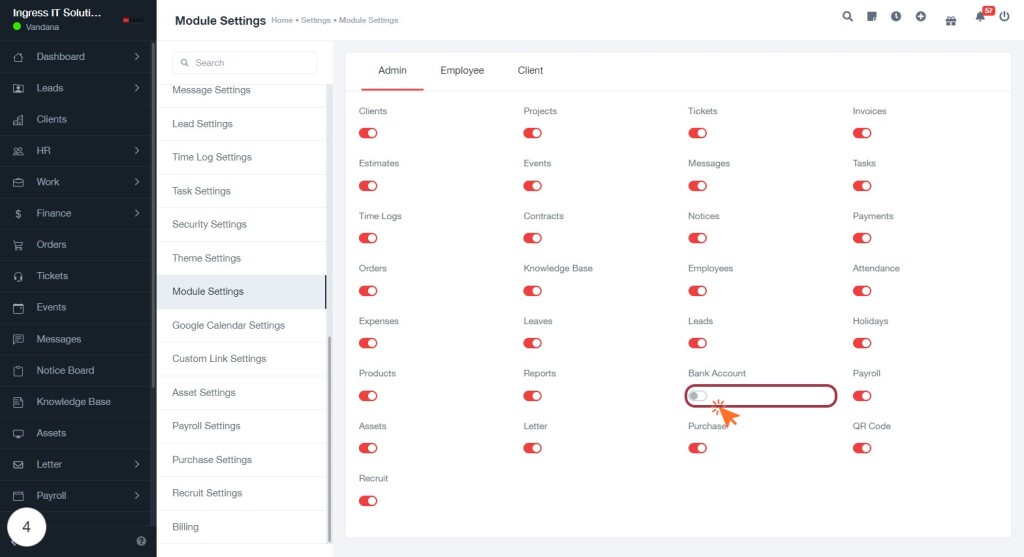
STEP 5: Toggle the Bank Account Module On/Off
- Locate the "Bank Account" toggle switch in the module settings.
- Click on the toggle switch to activate or deactivate the module.
- On: The switch will turn green, indicating the module is active.
- Off: The switch will turn gray, indicating the module is inactive.
- Ensure that the desired status is reflected before proceeding with other configurations.
- Review nearby options like "Purchase" and "Reports" for additional settings you may want to adjust.
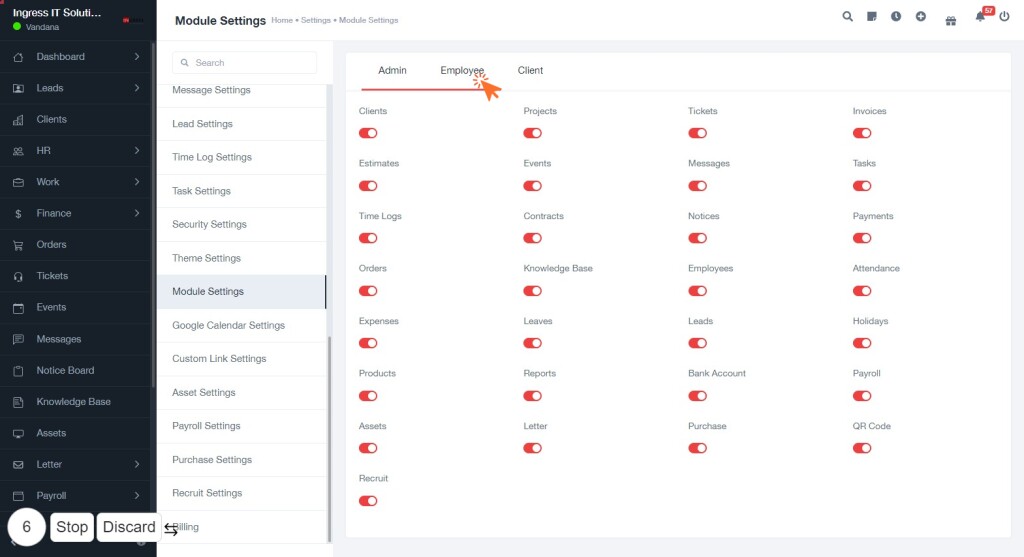
STEP 7: Select the "Employee" Tab to Access Employee Module Settings
- Click on the "Employee" tab located at the top of the settings interface. This will direct you to the employee-related settings.
- Once selected, you will see various options related to employee management, such as Clients, Projects, and Tickets.
- Review the available settings to manage employee permissions, access, and functionalities.
- Adjust the toggles next to each option as needed to enable or disable specific features for employees.
- Ensure to save any changes made before navigating away from this section.
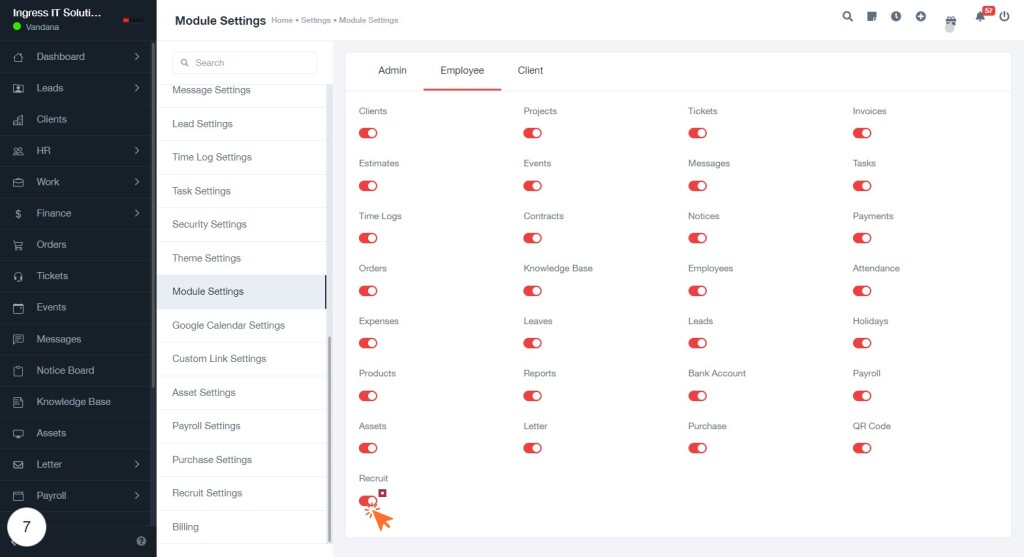
STEP 8: Toggle the Module Button to Activate/Deactivate Employee Module
- Locate the Recruit module in the settings panel on the right side of the screen.
- Click on the toggle switch next to Recruit to turn the module on (green) or off (red).
- Ensure the toggle reflects your desired setting:
- On: Employees can access the recruitment features.
- Off: Recruitment features will be disabled for employees.
- Review other modules nearby to manage additional settings as needed.
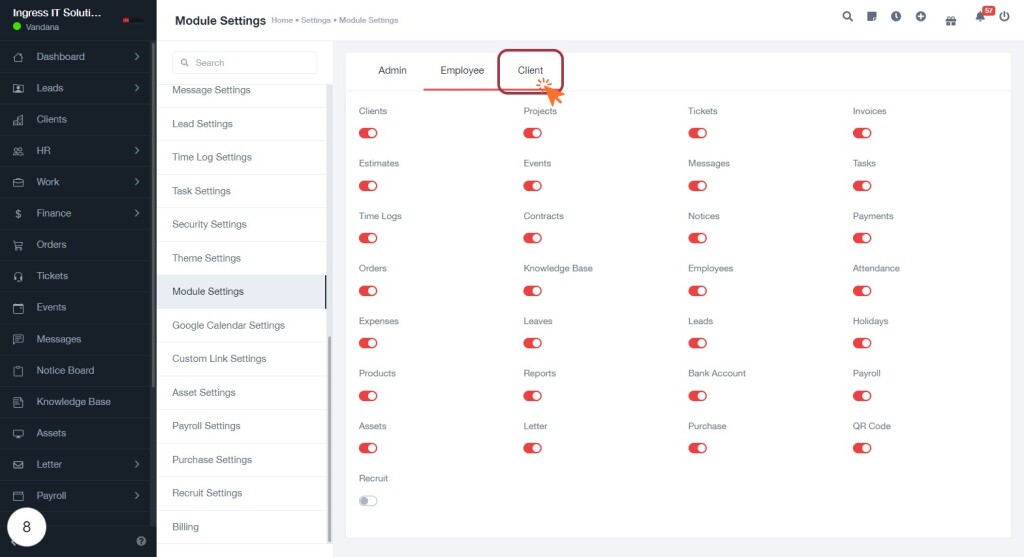
STEP 9: Click on the "Client" Tab to Access Client Modules
- Locate the "Client" tab at the top of the settings screen.
- Click on the "Client" tab to view various client-related modules.
- Once selected, you will see options such as Clients, Projects, Tickets, and more, each with toggle switches for activation.
- Review the available modules to manage client interactions effectively.
- Ensure to toggle any necessary modules on or off as per your requirements.
This will help you customize your client management settings efficiently.
