BizCRM App
Step-by-Step Guide to Adding and Setting Application Status in Your Workflow
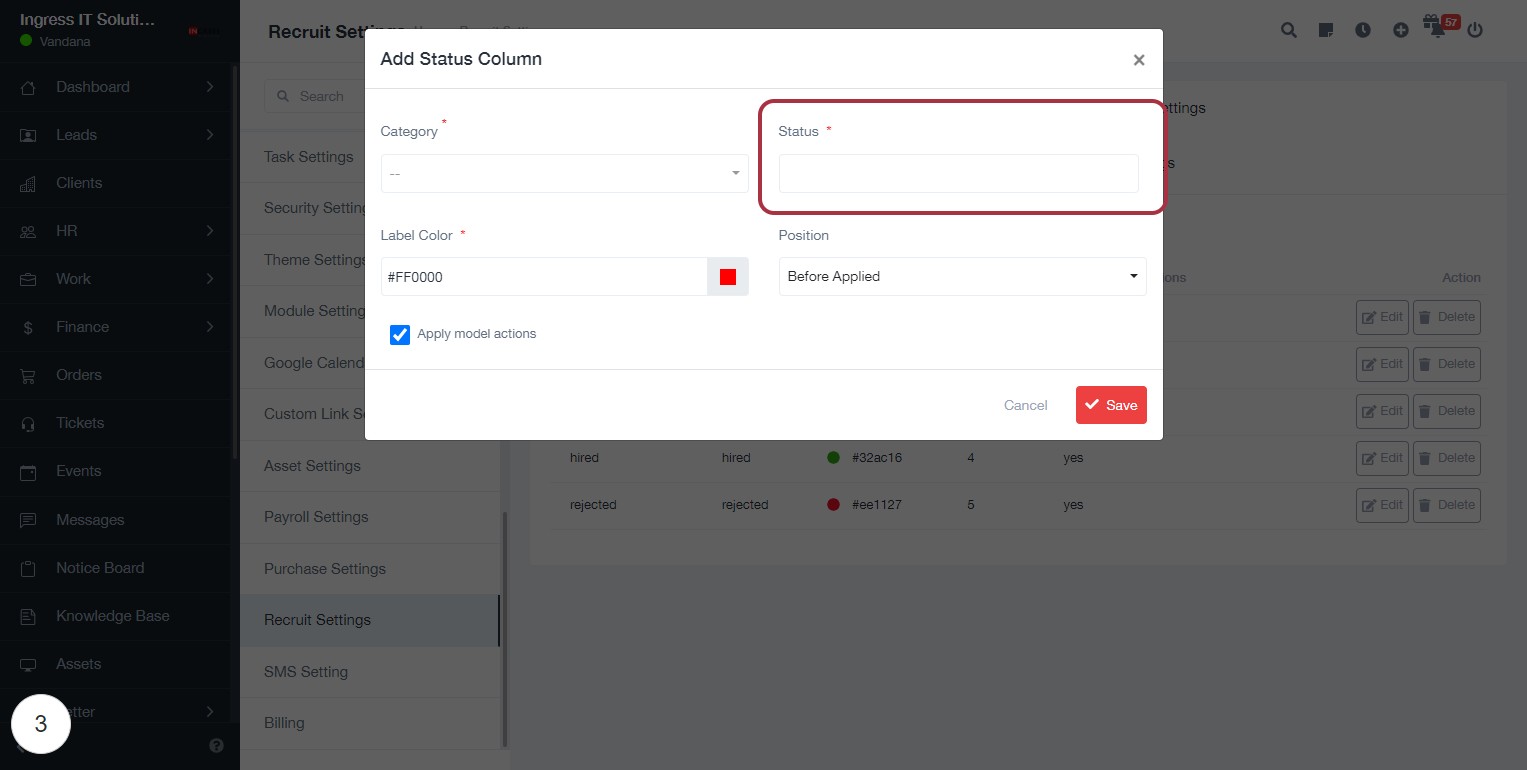
STEP 4: Fill the complete form to add a new status
- Click on the Status field to enter the new status name (required).
- Ensure to fill in all mandatory fields marked with an asterisk (*):
- Category: Select from the dropdown.
- Label Color: Choose a color for the status.
- Position: This will be selected in the next step.
- After completing the form, click Save to finalize your entry.

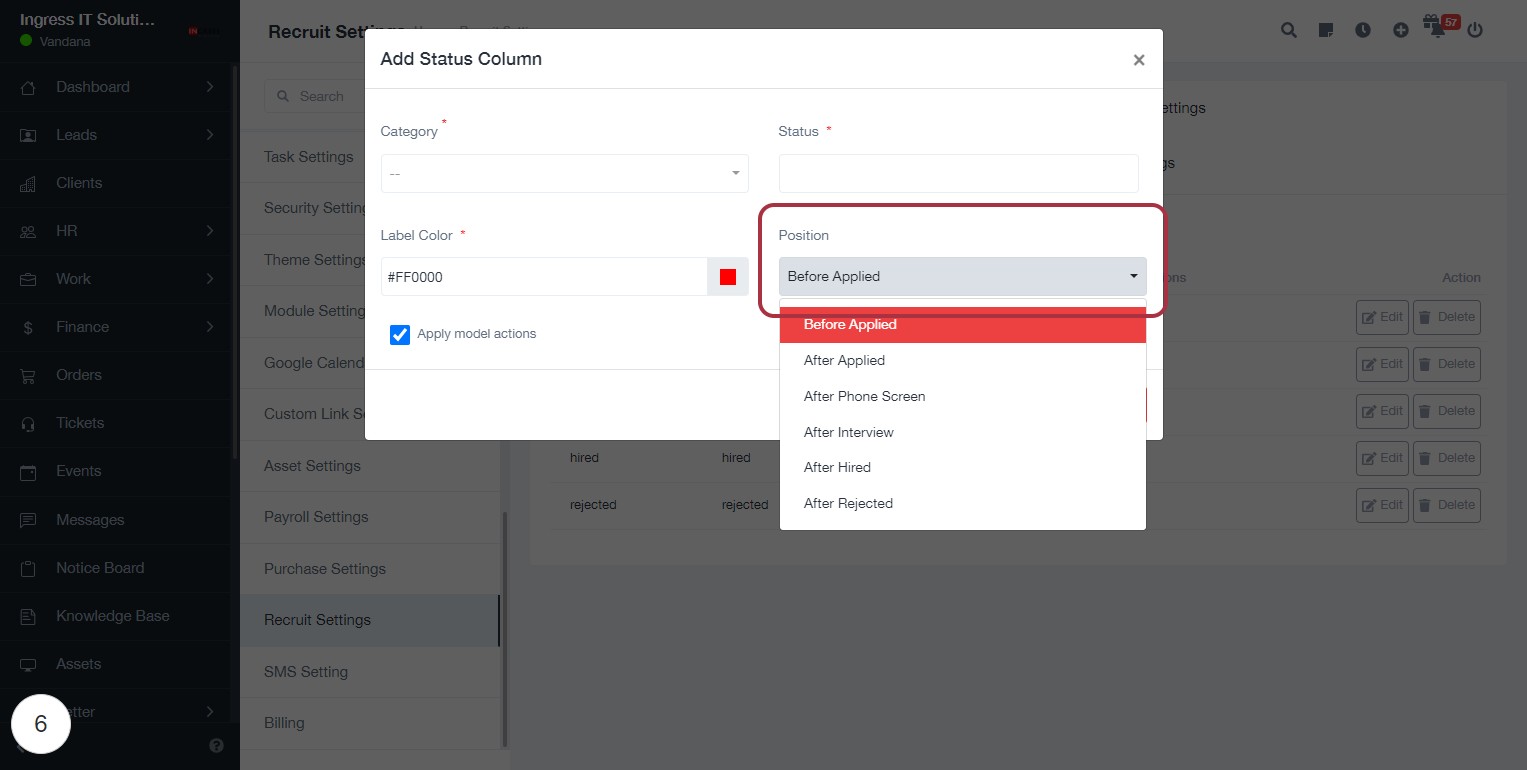
STEP 7: Select "Position" for Status Column
- Click on the "Position" dropdown menu.
- Choose an option from the list, such as "Before Applied," "After Applied," "After Phone Screen," "After Interview," "After Hired," or "After Rejected."
- Ensure that the selected position reflects the order of the application status in your workflow.
- Review other required fields: Category (), Status (), and Label Color (*), marked with an asterisk.

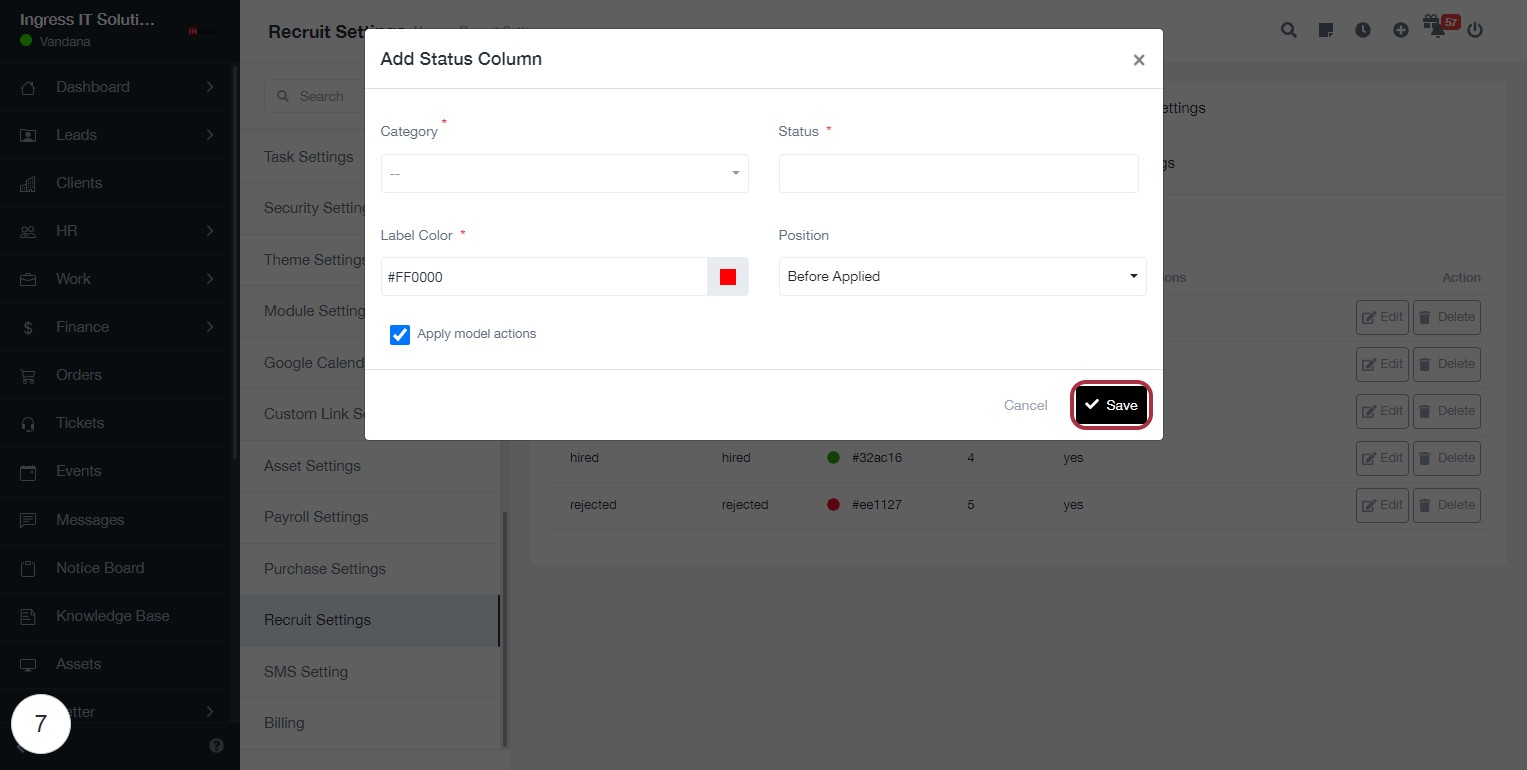
STEP 8: Click "Save" to Finalize Status Column Settings
- Ensure all required fields marked with an asterisk (*) are filled:
- Category
- Status
- Label Color
- Review the selected Position.
- Click the "Save" button located at the bottom right of the dialog to save your changes.
- Confirm that your new status column appears in the settings list after saving.
