BizCRM App
Step-by-Step Guide to Adding and Managing Leave Types in the HR System
STEP 1: Select "Leaves Type Settings" to Manage Leave Types
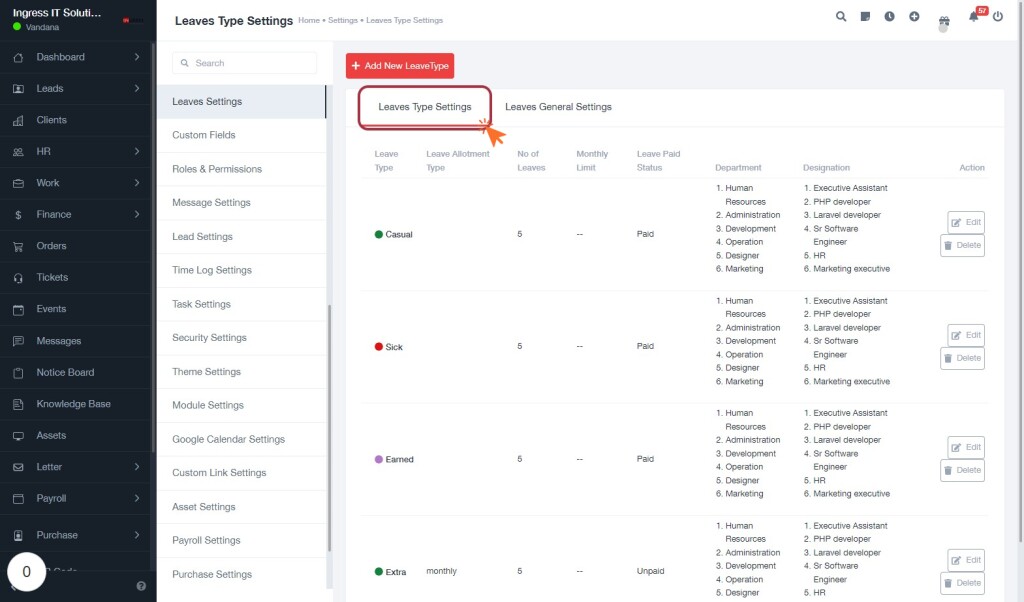
- Click on the "Leaves Type Settings" tab to access the configuration options for various leave types.
- Here, you can view existing leave types, their allotments, and limits.
- To add a new leave type, click the "+ Add New Leave Type" button located at the top right of the screen.
- You can edit or delete existing leave types by selecting the corresponding options next to each entry in the list.
- Ensure to review the leave type details, such as the number of leaves and monthly limits, to maintain accurate records.
STEP 2: Click "Add New LeaveType" to Create a New Leave Category
-
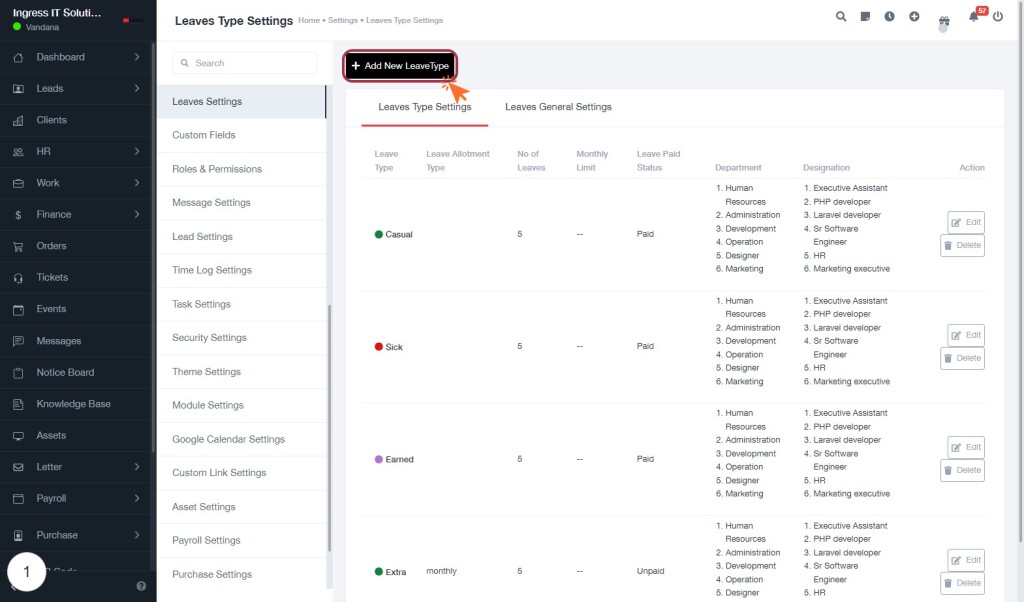
Locate the "Add New LeaveType" button at the top of the Leaves Type Settings section.
-
Click on this button to initiate the process of adding a new leave type.
-
A form will appear where you can input details for the new leave type, including:
- Leave Type Name: Enter the name of the leave type you wish to create.
- Leave Allotment: Specify the number of leaves allocated for this type.
- Monthly Limit: Set any monthly limits if applicable.
-
After filling in the required fields, ensure to review your entries for accuracy before saving.
STEP 3: Select the "General" Tab to Configure Leave Type
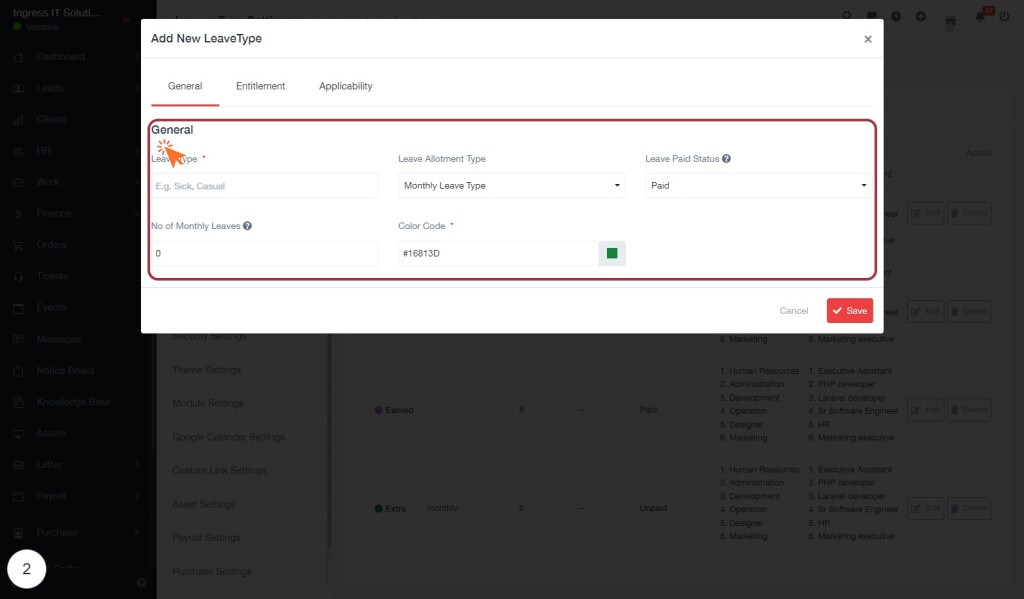
- Click on the "General" tab to access the leave type configuration settings.
- In this section, you will see several input fields:
- Leave Type: Enter the name of the leave type (e.g., Sick, Casual).
- Leave Allotment Type: Choose the allotment type from the dropdown (default is Monthly Leave Type).
- No of Monthly Leaves: Specify the number of leaves allowed per month.
- Color Code: Input a color code for visual identification (e.g., #16813D).
- Ensure all required fields are filled out accurately before proceeding to the next step.
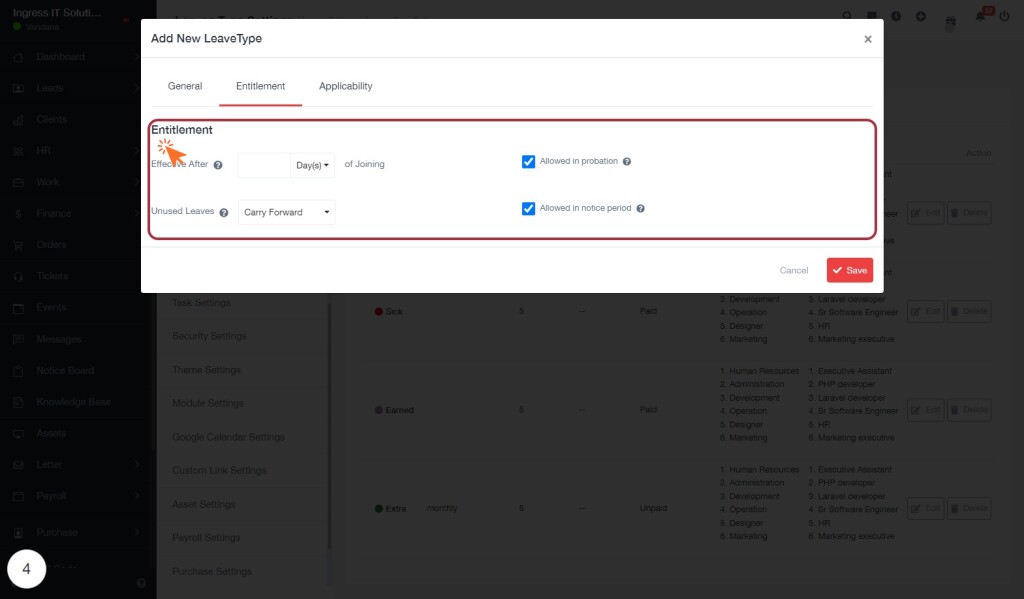
STEP 5: Select the "Entitlement" Tab to Configure Leave Settings
- Click on the "Entitlement" tab to access leave configuration options.
- In the "Effective After" section, specify the duration (in days) after which the leave will be applicable from the date of joining.
- Choose how unused leaves should be handled from the "Unused Leaves" dropdown; options may include "Carry Forward" or other policies.
- Ensure all selections are checked for proper application in the system.
- Review your entries before proceeding to the next tab for further configurations.
STEP 7: Select the "Applicability" Tab to Define Leave Type Criteria
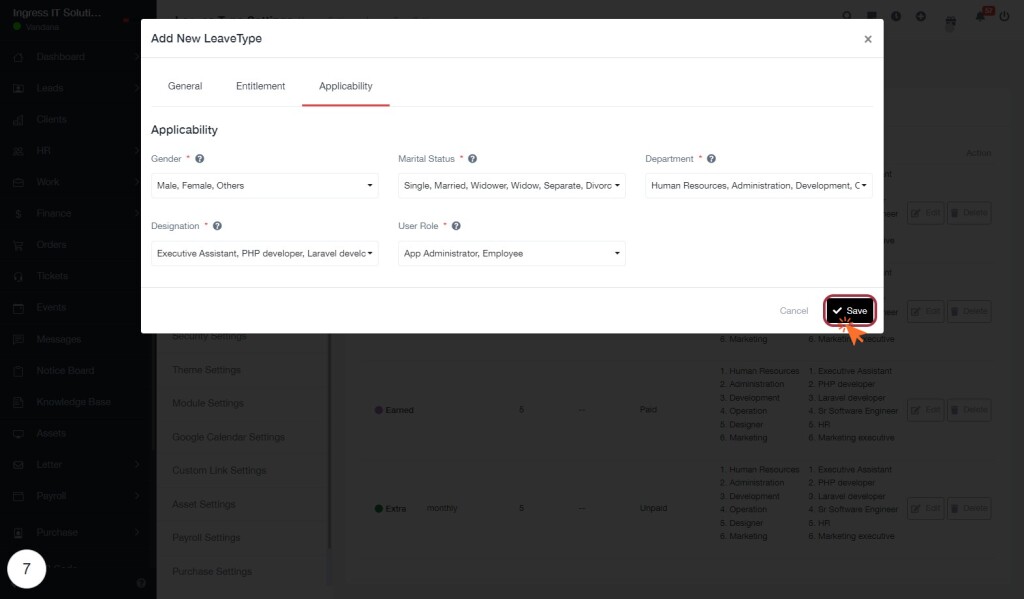
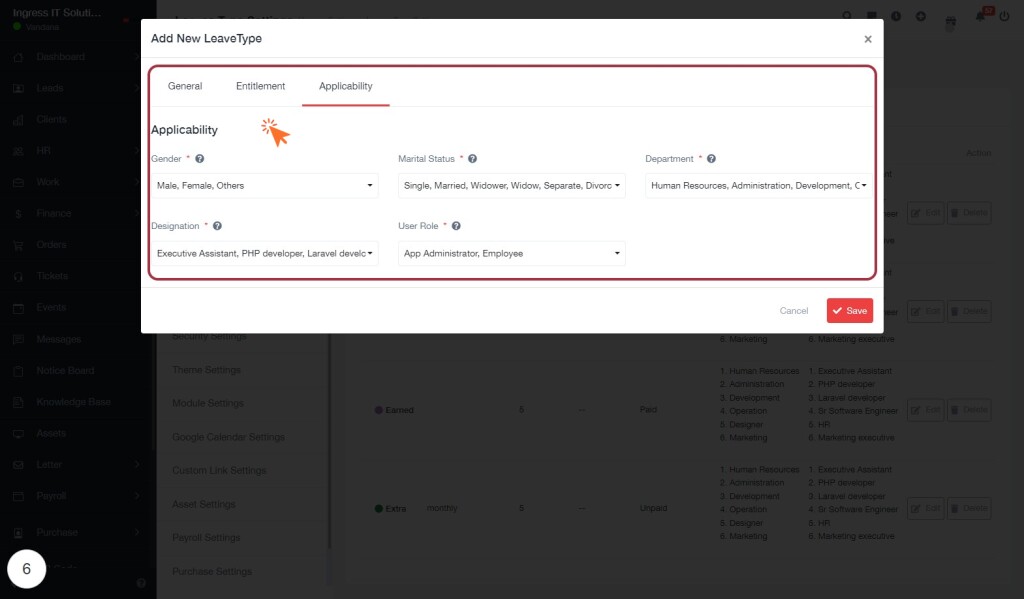
- Click on the "Applicability" tab to access the relevant fields for defining the criteria for the leave type.
- In this section, you will find several input fields:
- Gender: Select from options like Male, Female, or Others.
- Marital Status: Choose from options such as Single, Married, Widower, etc.
- Designation: Specify the job title, e.g., Executive Assistant, PHP Developer.
- User Role: Indicate the role, such as App Administrator or Employee.
- Ensure all required fields marked with an asterisk (*) are filled out before proceeding.
STEP 8: Click "Save" to Confirm Your Changes
- After filling out the required fields, including Status and Department, ensure all information is accurate.
- Locate the Save button at the bottom right of the form.
- Click on the Save button to confirm and store your changes.
- A confirmation message may appear, indicating that your information has been successfully saved.
- If you need to make further adjustments, you can return to the form, modify the entries, and click Save again.
This action ensures that your updates are recorded in the system.
