BizCRM App
Step-by-Step Guide to Customize App Settings: Date & Time Format, Timezone, Currency, Language, and Data Export Options
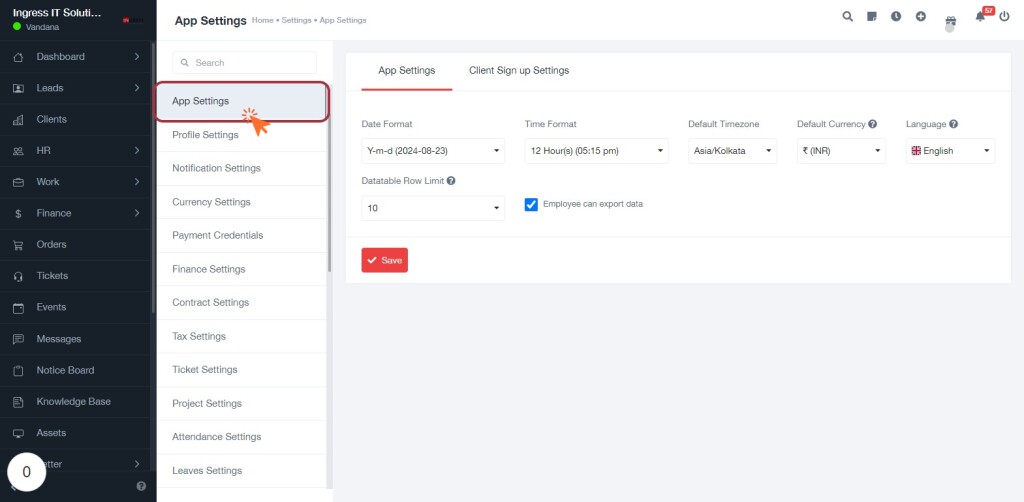
STEP 1: Click on "App Settings" to Configure Application Preferences
- Navigate to the App Settings section in the sidebar.
- Review the following input fields:
- Date Format: Select your preferred date format.
- Time Format: Choose between 12-hour or 24-hour format.
- Default Timezone: Set the appropriate timezone.
- Default Currency: Select the currency type.
- Language: Choose your preferred language.
- Ensure to check the option for Employee can export data if applicable.
- Click Save to apply your settings.
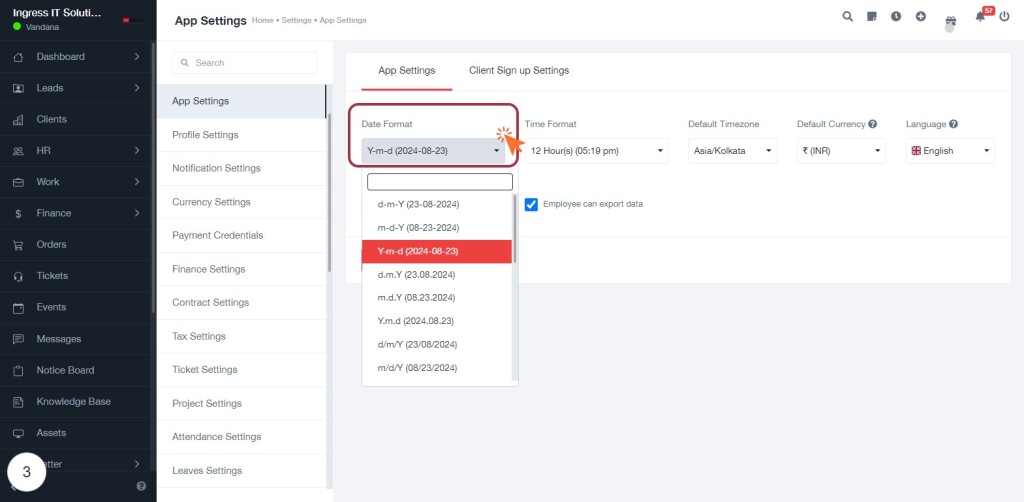
STEP 4: Click on "Date Format" to Set Your Preferred Date Style
- Locate the Date Format section highlighted in red.
- Click on the Date Format dropdown to view available options.
- Select your preferred date format from the list:
- Y-m-d (2024-08-23)
- d-m-Y (23-08-2024)
- d-m-y (23-08-24)
- m/d/Y (08/23/2024)
- etc.
- Ensure your selection aligns with your application preferences before proceeding.
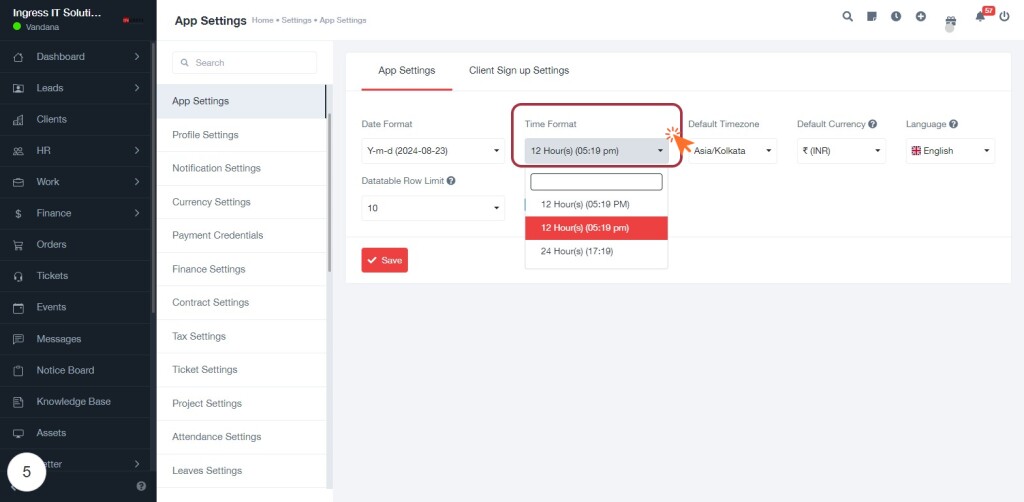
STEP 6: Click on "Time Format" to Set Your Preferred Time Style
- Navigate to the Time Format section in the App Settings.
- Click on the dropdown menu to view available time formats.
- Options include:
- 12 Hour(s) (05:19 pm)
- 24 Hour(s) (17:19)
- Select your preferred time format by clicking on it.
- Ensure your selection is highlighted before proceeding.
- After selection, continue to the next step by clicking on Default Timezone.
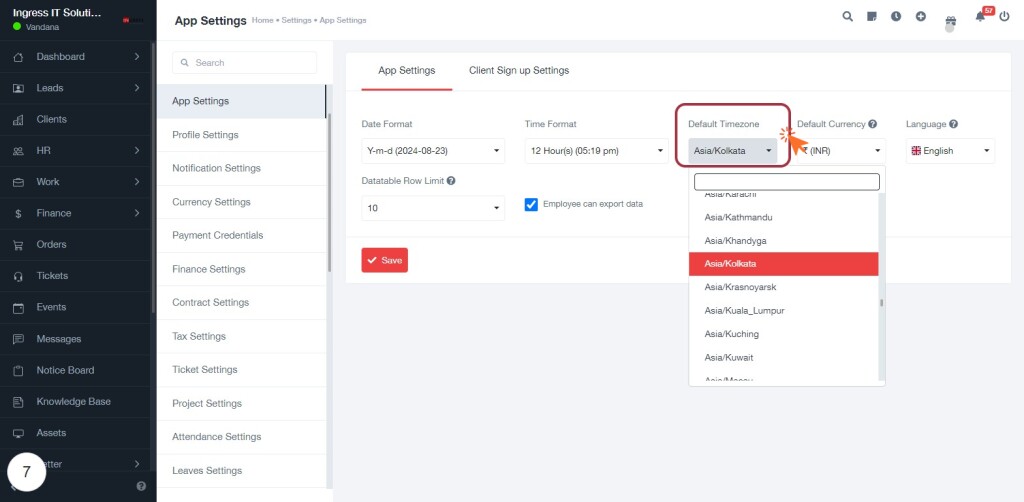
STEP 8: Click on "Default Timezone" to Set Your Preferred Time Zone
- Locate the "Default Timezone" section in the App Settings.
- Click on the dropdown menu to view available time zones.
- Select "Asia/Kolkata" from the list of options.
- Ensure the selection is highlighted to confirm your choice.
- Proceed to the next step by clicking on "Default Currency" to continue your settings.
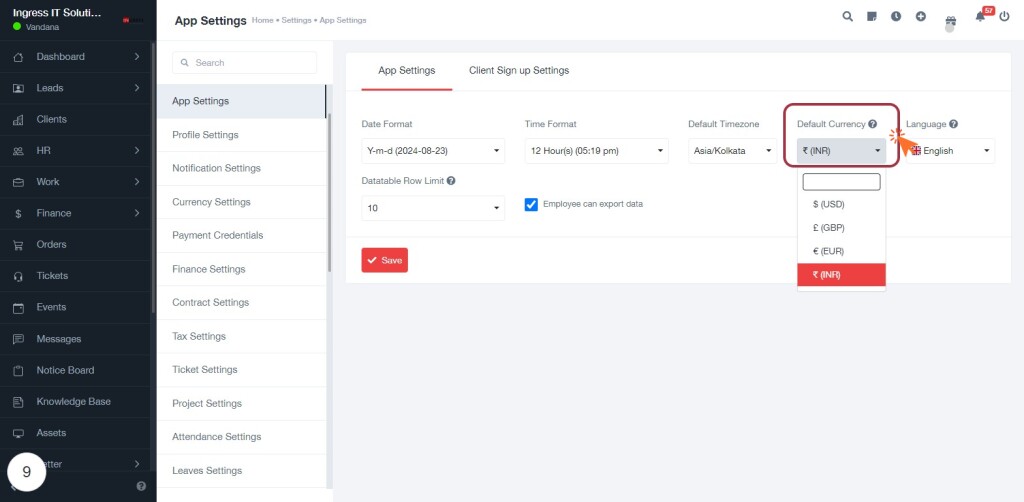
STEP 10: Click on "Default Currency" to Set Your Preferred Currency
- Navigate to the App Settings section.
- Locate the Default Currency field highlighted in red.
- Click on the dropdown menu next to Default Currency.
- Select your preferred currency from the available options (e.g., ₹ (INR), $ (USD), £ (GBP), € (EUR)).
- Ensure your selection aligns with your financial preferences.
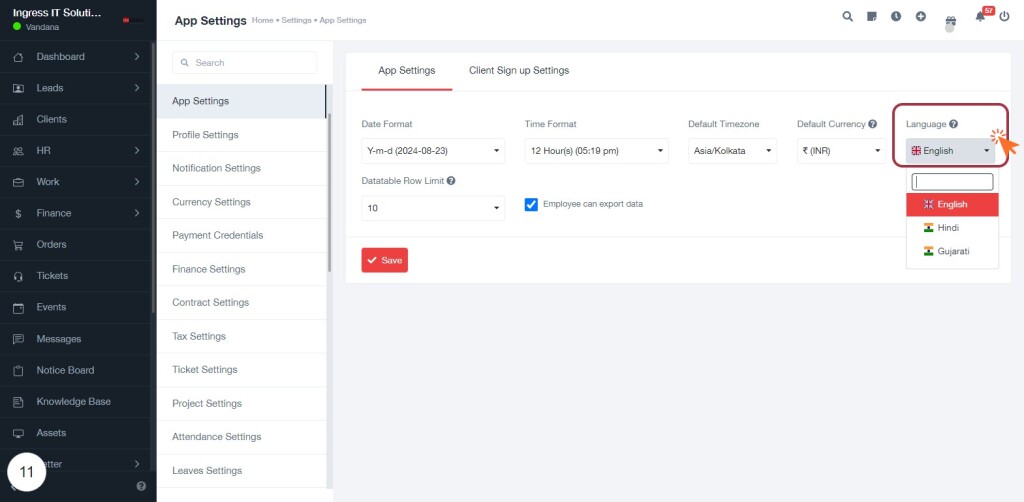
STEP 12: Click on "Language" to Select Your Preferred Language
- Locate the "Language" option highlighted in the settings.
- Click on the dropdown menu to view available languages.
- Select your preferred language from the options: English, Hindi, or Gujarati.
- Ensure your selection is saved for future reference.
- Proceed to the next step by clicking on "Datatable Row Limit" for further settings.
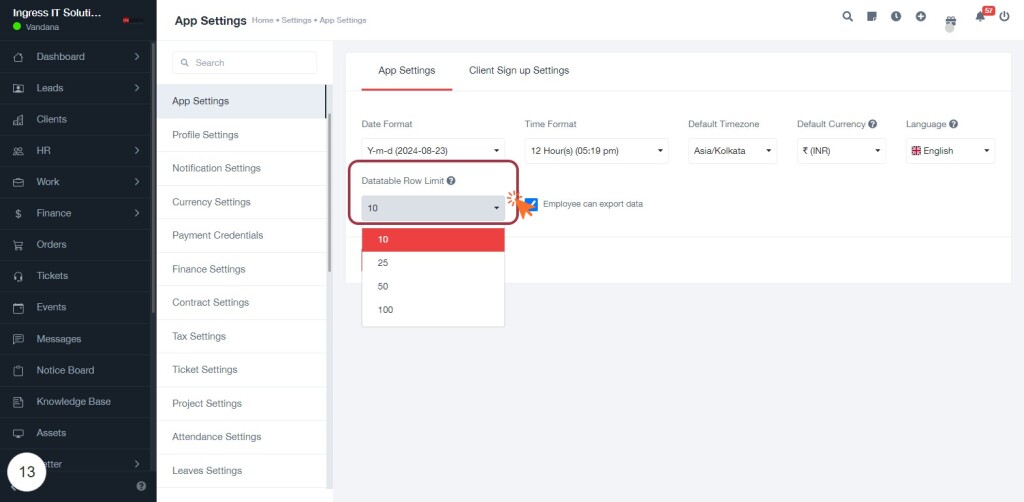
STEP 14: Click on "Datatable Row Limit" to Set Your Preferences
- Locate the "Datatable Row Limit" section within the App Settings.
- Click on the dropdown to view options for the number of rows displayed.
- Select your preferred limit from the following options: 10, 25, 50, or 100.
- Ensure your selection aligns with your data viewing needs.
- Proceed to the next step by clicking on "Employee can export data."
STEP 15: Click on "Employee can export data" to Enable Export Functionality
- Locate the checkbox labeled "Employee can export data" in the Client Sign Up Settings section.
- Click on the checkbox to enable the option, allowing employees to export data.
- Ensure the checkbox is marked, indicating that the feature is active.
- Proceed to the next step by clicking on "Save" to apply your changes.
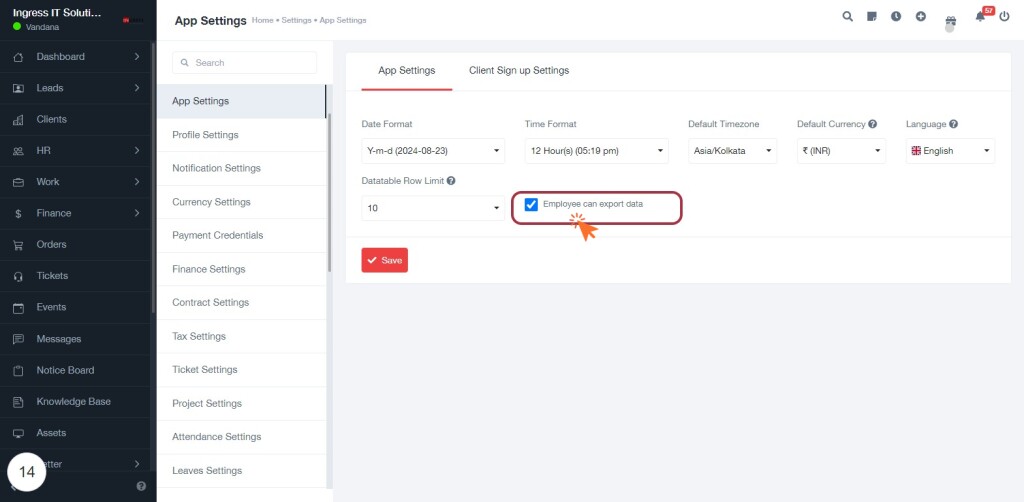
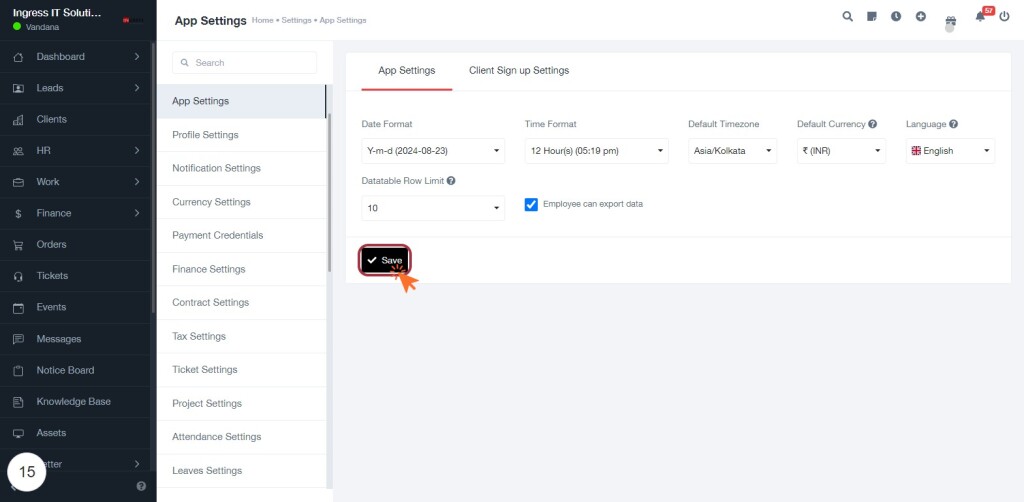
STEP 16: Click on "Save" to Confirm Settings
- Ensure all required fields are filled out (indicated by '*').
- Review your selections for Date Format, Time Format, Default Timezone, Default Currency, and Language.
- Click the Save button to apply your changes.
- Confirm that the settings are saved successfully; a notification may appear indicating success.