BizCRM App
Step-by-Step Guide to Adding a New Lead Contact and Company Details in an Application
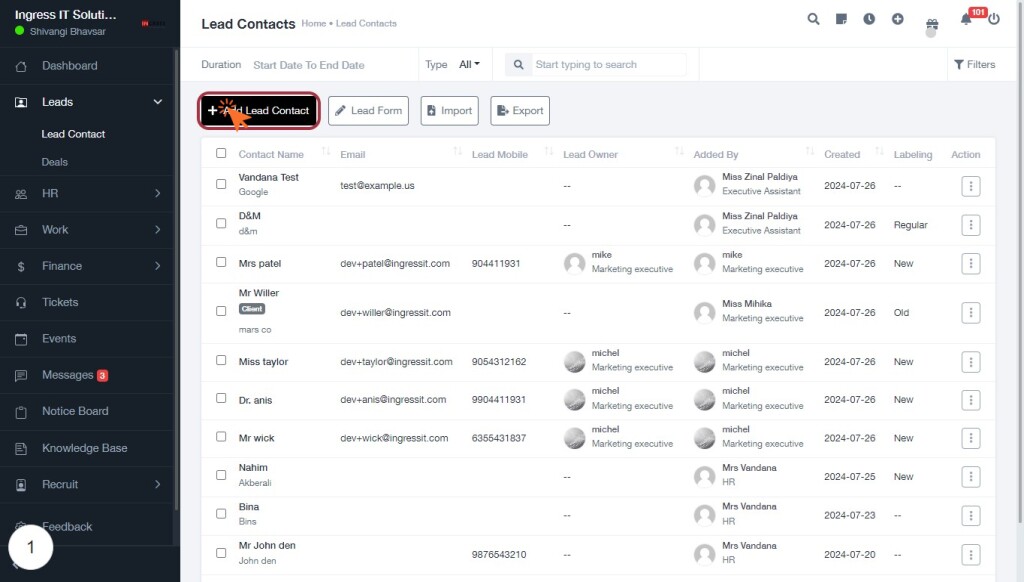
STEP 2: Click on "Add Lead Contact"
- Locate the "Add Lead Contact" button on the interface.
- Click on the button to initiate the process of adding a new lead contact.
- Ensure you are in the "Lead Contacts" section of the application.
- After clicking, you will proceed to the next step to view the "Lead Contact Detail".
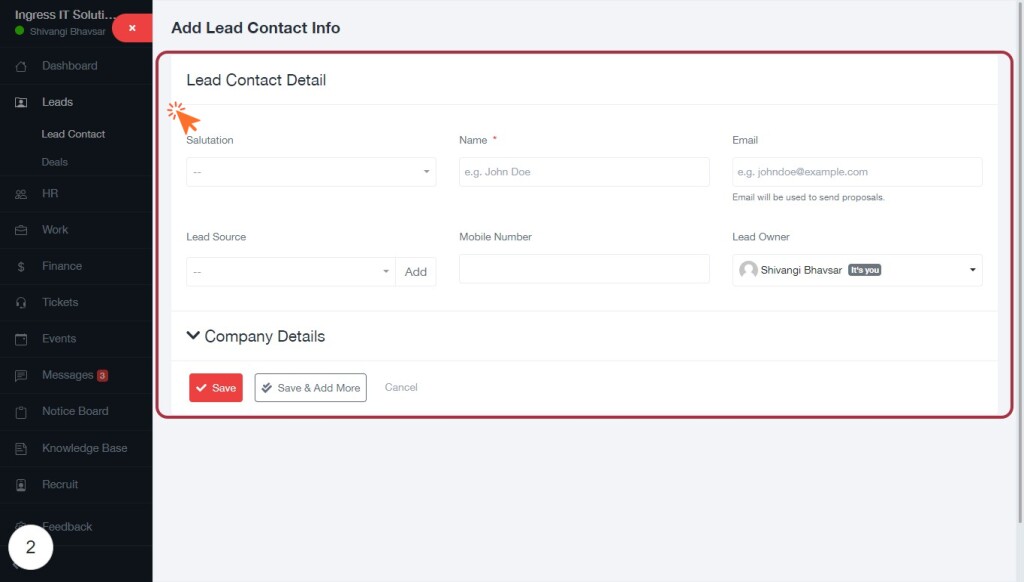
STEP 3: Click on "Lead Contact Detail"
-
Fill in the required fields:
- Salutation: Select from the dropdown.
- Name: Enter the contact's name (required).
- Email: Provide a valid email address (required).
- Lead Source: Choose the source from the dropdown.
- Mobile Number: Enter the contact's mobile number.
- Lead Owner: Confirm the assigned owner.
-
Save your input:
- Click on the Save button to proceed.
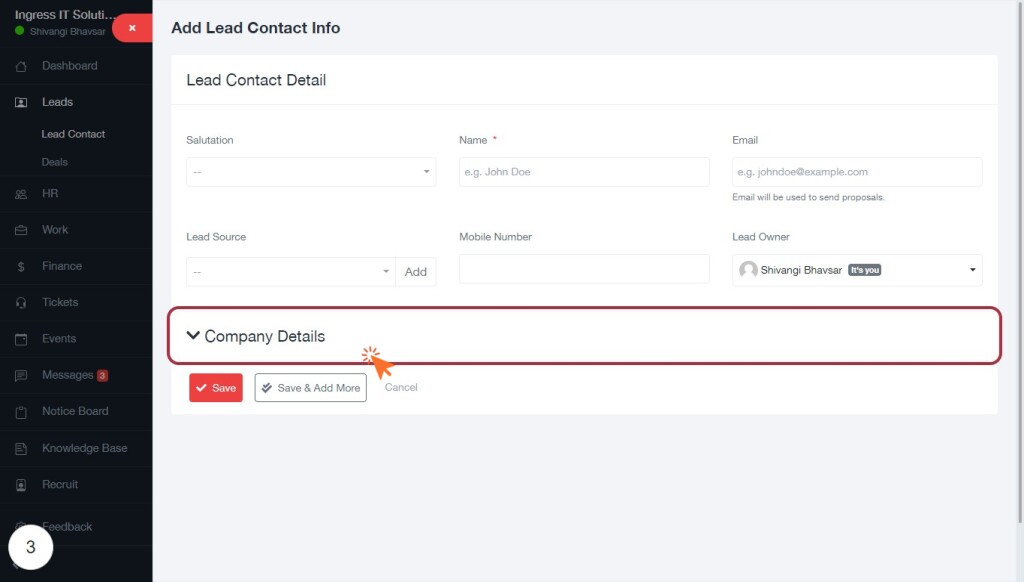
STEP 4: Click on "Company Details"
- Click on the Company Details section to expand it.
- Ensure all required fields marked with an asterisk (*) are filled out.
- Review the Lead Contact Detail form for accuracy.
- Prepare to enter additional information in the Company Details section in the next step.
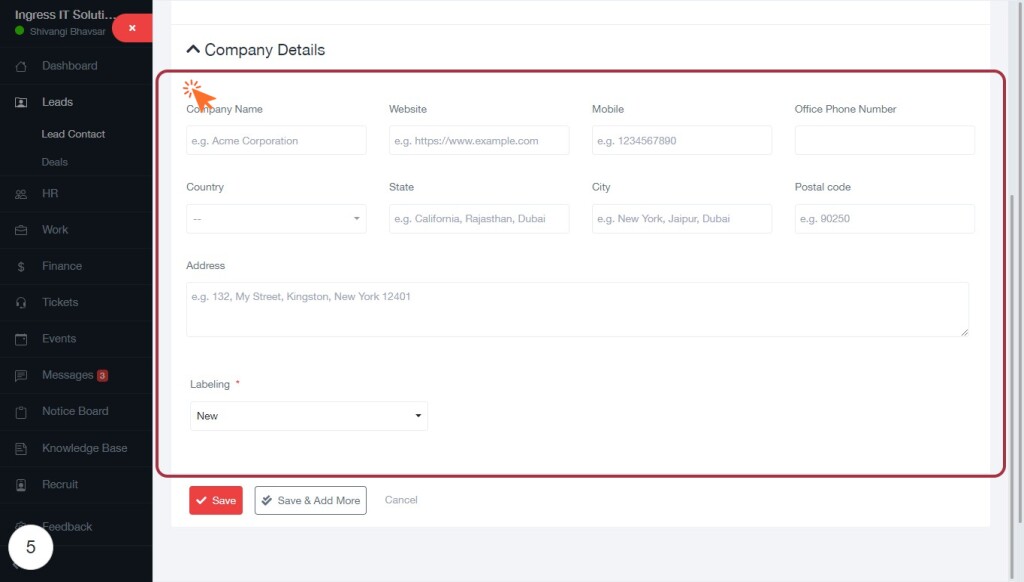
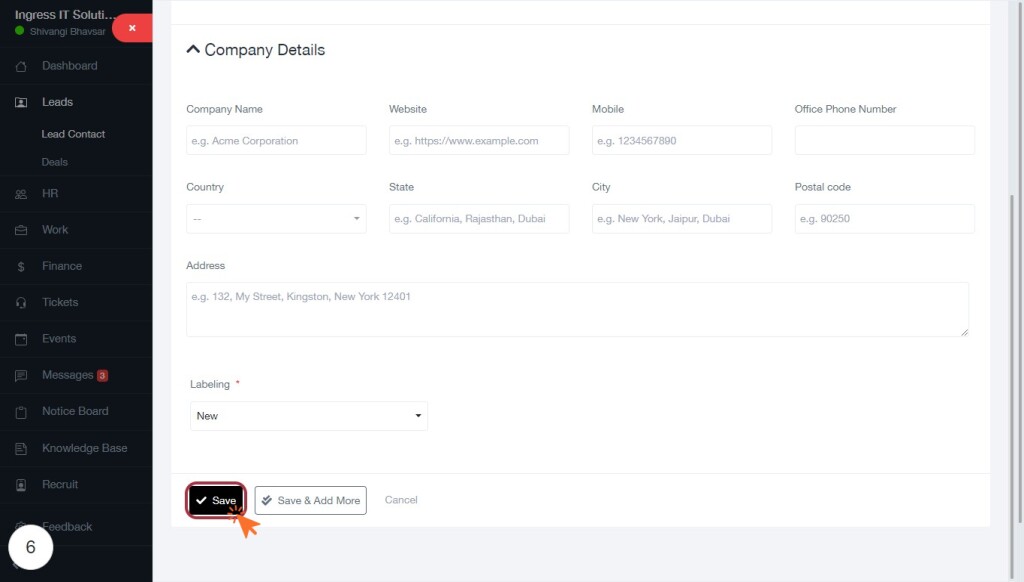
STEP 6: Click on "Company Name" to Enter Details
-
Click on the Company Name field to input the name of the company.
-
Fill in the following required fields:
- Website: Provide the company's website URL.
- Mobile: Enter a mobile contact number.
- Office Phone Number: Input the office contact number.
-
Complete optional fields:
- Country: Select from the dropdown.
- State: Choose from the dropdown.
- City: Specify the city.
- Postal Code: Enter the postal code.
- Address: Provide the full address.
- Labeling: Select a label from the dropdown (marked with *).
-
After filling in the details, proceed to the next step by clicking on Save.
STEP 7: Click on "Save" to Finalize Company Details
- Ensure all required fields marked with an asterisk (*) are filled out.
- Review the entered information for accuracy.
- Click the Save button to save the company details.
- If additional entries are needed, consider using the Save & Add More option.
- If you wish to cancel, click the Cancel button.
STEP 1: test
test