BizCRM App
Step-by-Step Guide to Creating and Customizing a New Sales Pipeline
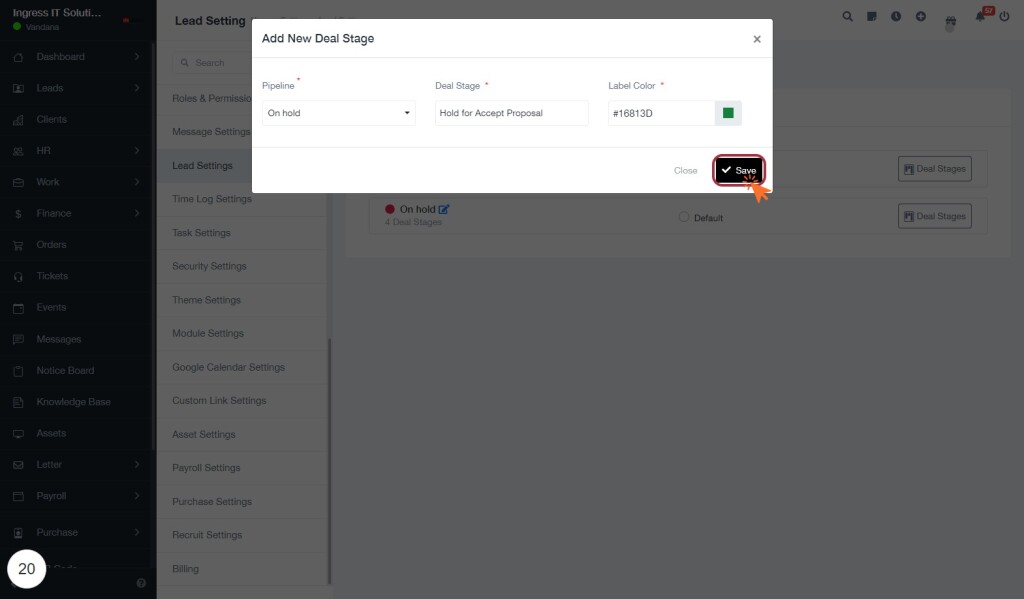
STEP 1: Click "Add New Pipeline" to Create a New Sales Pipeline
- Navigate to the Lead Settings section on the left sidebar.
- Locate the Add New Pipeline button at the top right of the Pipeline card layout.
- Click on the Add New Pipeline button to initiate the creation process.
- A form will appear, prompting you to enter details for your new pipeline, such as:
- Pipeline Name: Specify a unique name for your pipeline.
- Deal Stages: Define the stages involved in your pipeline.
- Fill in the required fields and review your entries for accuracy.
- Once completed, click Save to finalize the creation of your new pipeline.
This action will help you manage your sales processes effectively.
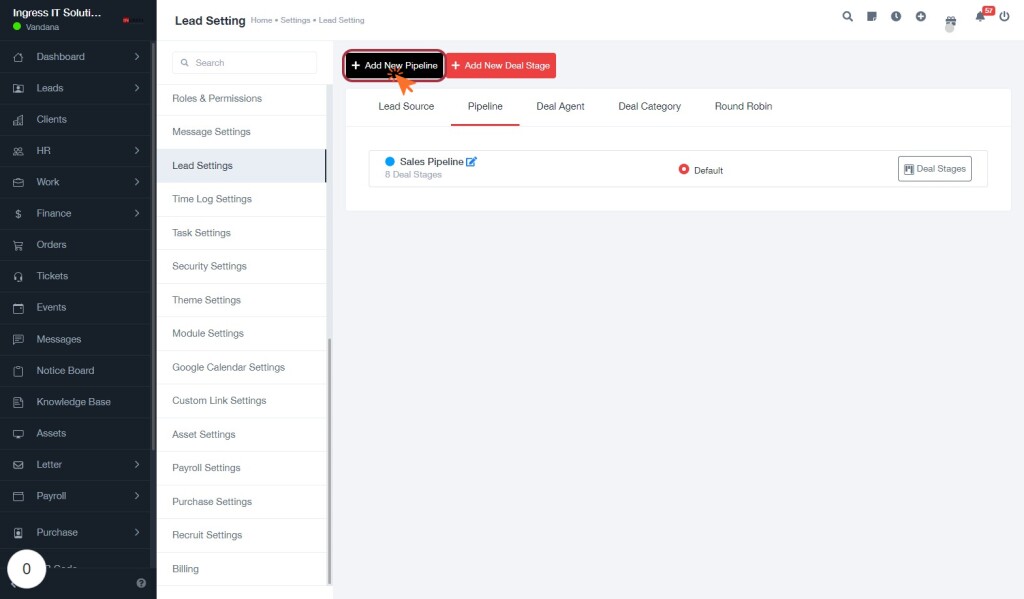
STEP 8: Enter Name for New Pipeline
- Click on the highlighted "Name" field within the "Add New Pipeline" dialog.
- Type the desired name for your new pipeline. This field is mandatory, indicated by the asterisk (*).
- Ensure the name is descriptive to help identify the pipeline's purpose easily.
- After entering the name, you can proceed to fill in other fields like "Label Color" to customize your pipeline further.
- Review your entries before saving to ensure all required information is complete.
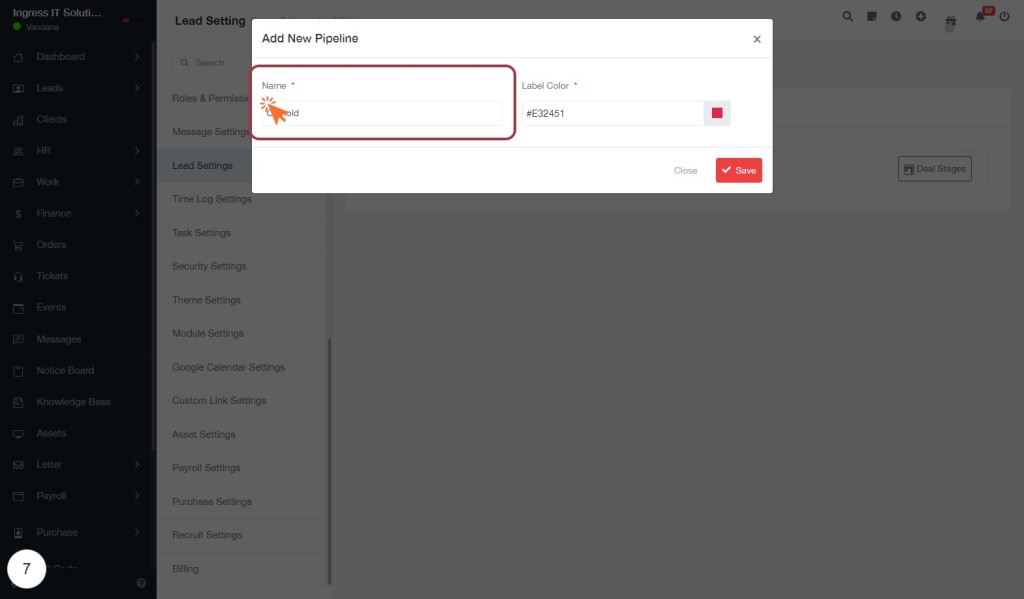
STEP 9: Select Label Color by Clicking on Right Side Color Picker
- Locate the "Label Color" field in the "Add New Pipeline" dialog box.
- Click on the color picker icon located on the right side of the "Label Color" input area.
- A color selection palette will appear, allowing you to choose a color for your label.
- Select your desired color by clicking on it. The hex code will automatically populate in the input field.
- Ensure the selected color meets your visual preferences for better organization.
- After selecting, proceed to fill in other required fields before saving your changes.
STEP 10: Click "Save" to Confirm Your Changes
- After entering the required information in the form, locate the "Save" button at the bottom right of the dialog box.
- Ensure that all mandatory fields, such as Label Color, are filled out correctly.
- Click on the "Save" button to confirm your changes. This action will save the information you have entered.
- If you wish to exit without saving, you can click the "Close" button instead.
- Once saved, you may see a confirmation message indicating that your changes have been successfully recorded.
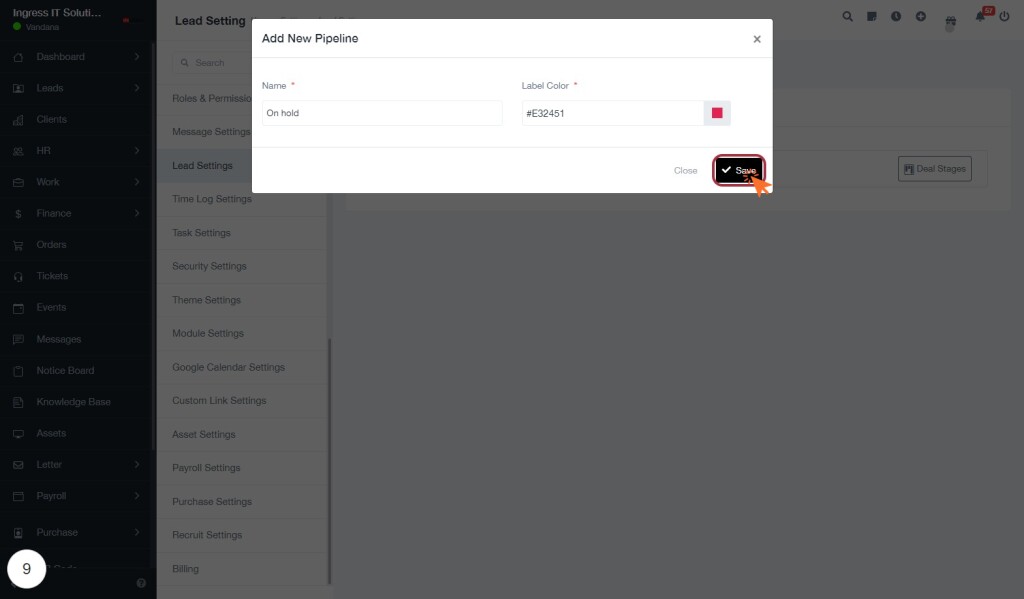
STEP 18: Select "Pipeline" from Dropdown Menu
- Click on the dropdown menu labeled "Pipeline" in the Add New Deal Stage section.
- A list of available pipelines will appear; you can scroll through the options.
- Select "Sales Pipeline" or any other relevant pipeline from the list.
- Ensure that you choose the correct pipeline as it will affect the deal stage settings.
- After selection, proceed to fill in the "Deal Stage" field with the appropriate information related to your selected pipeline.
This step is crucial for organizing your deals effectively.
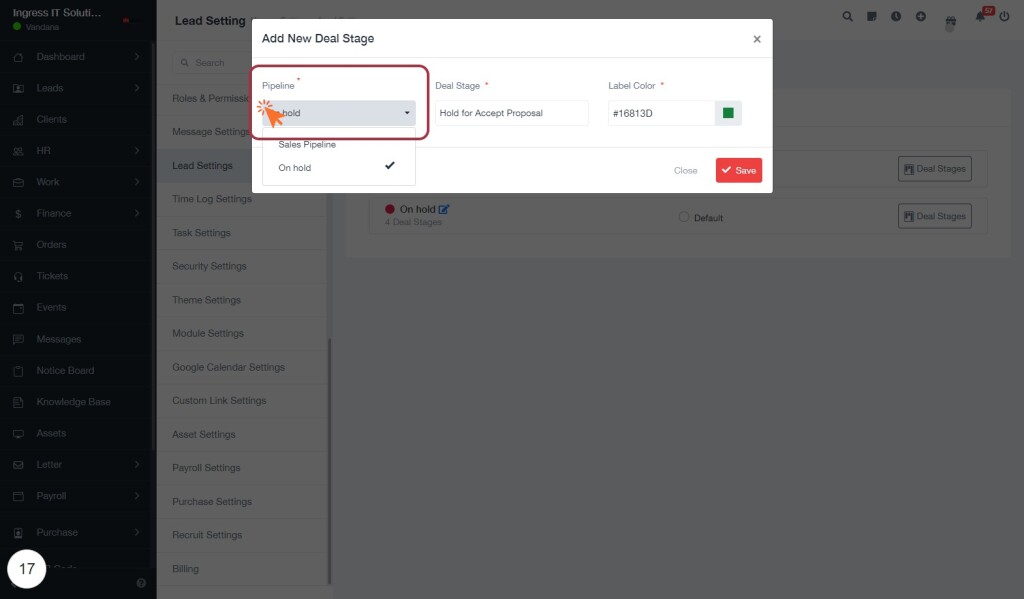
STEP 19: Enter Deal Stage Title
- Click on the highlighted "Deal Stage" field to initiate input.
- Type the desired title for the deal stage, ensuring it accurately reflects the stage's purpose (e.g., "For Accept Proposal").
- Review the adjacent fields:
- Pipeline: Select the relevant pipeline from the dropdown.
- Label Color: Choose a color to visually categorize the deal stage.
- Ensure all required fields marked with an asterisk (*) are filled before proceeding.
- Once completed, click the "Close" button to save your changes.
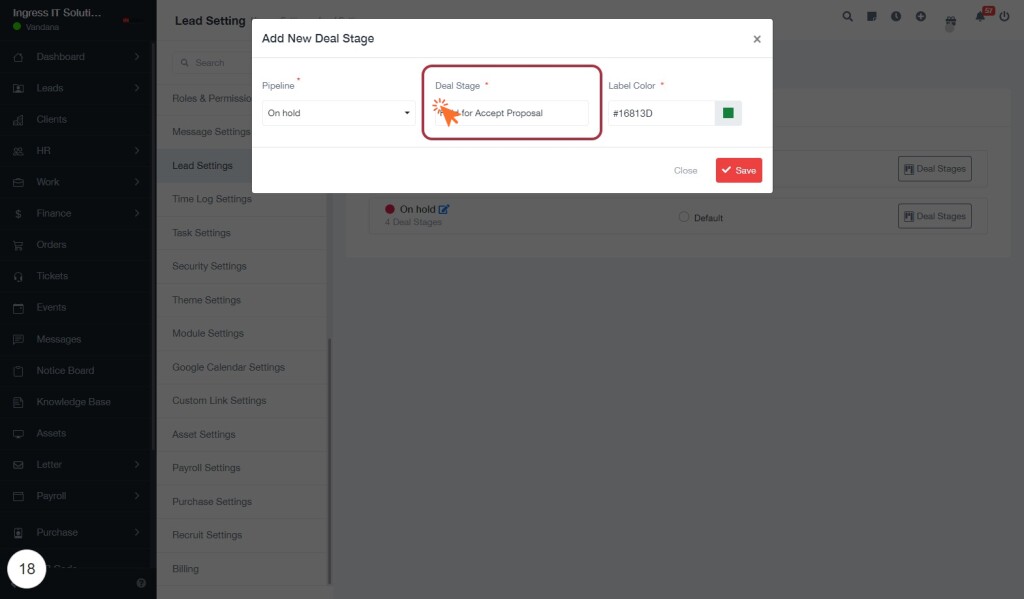
STEP 20: Select Label Color by Clicking on Color Picker
- Locate the "Label Color" section in the form.
- Click on the color picker icon next to the text field displaying the current color code (e.g., #16813D).
- A color selection palette will appear, allowing you to choose a new color.
- Hover over the desired color and click to select it.
- The selected color will update in the text field.
- Ensure to click "Save" to apply your changes before closing the dialog.
This will help you customize the label color effectively.
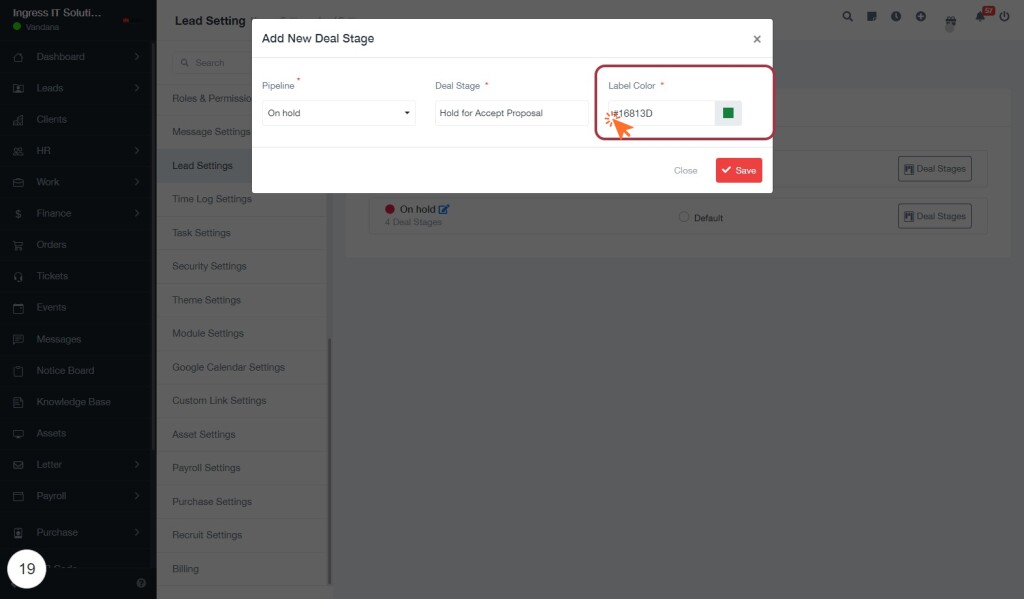
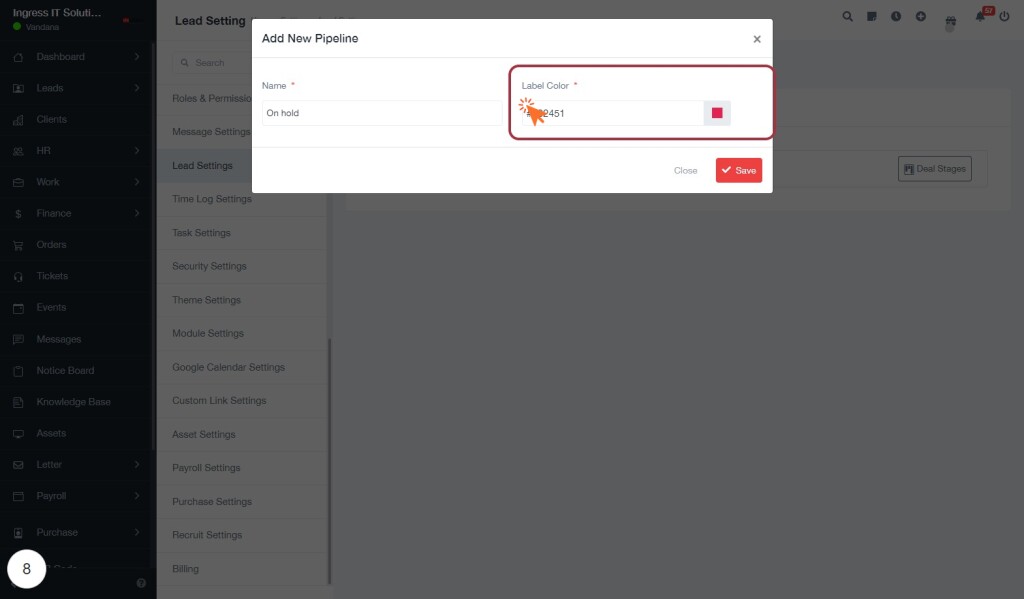
STEP 21: Click "Save" to Finalize Your Changes
- Locate the Save button at the bottom right of the dialog box.
- Ensure all required fields, such as Deal Stage and Label Color, are filled out correctly.
- Click the Save button to confirm your entries and apply the changes.
- After saving, you may see a confirmation message indicating that your changes have been successfully saved.
- If you need to make further adjustments, you can reopen the dialog by clicking on the relevant section again.
