BizCRM App
Step-by-Step Guide to Adding and Submitting Expense Details
STEP 1: Click "Add Expense" to Begin
- Click the "Add Expense" button located in the Expenses section to initiate the process.
- This action will direct you to the form where you can enter details about your expense.
- Ensure you have all necessary information ready, including the relevant bill copy for attachment.
- Look for any required fields marked with an asterisk (*) to complete the form accurately.

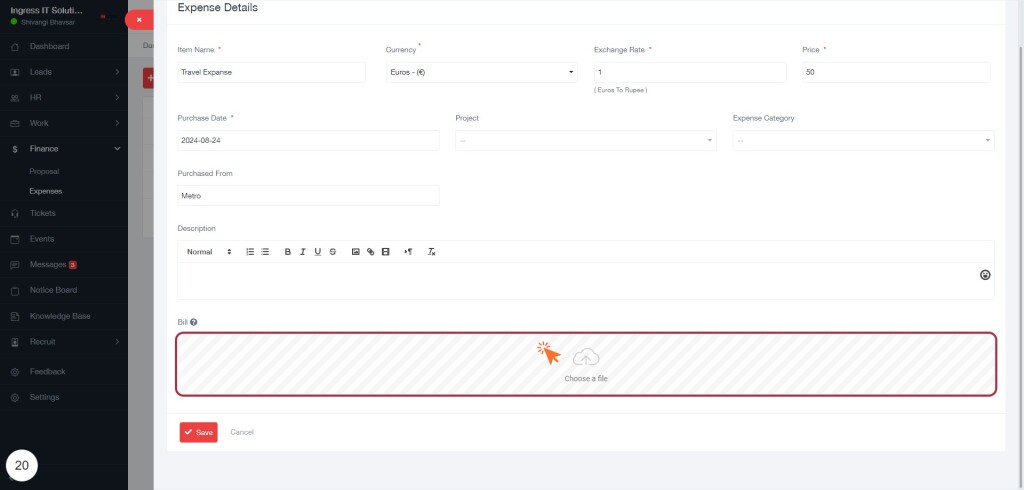
STEP 21: Fill the Form of Expense Details and Attach the Relevant Bill Copy
- Enter the Item Name (required).
- Select the Currency (required).
- Input the Exchange Rate (required).
- Specify the Price (required).
- Fill in the Purchase Date.
- Choose the Project.
- Indicate where the item was Purchased From.
- Provide a Description.
- In the highlighted area, click to upload the relevant Bill (required).
- Review all entries before proceeding to the next step.
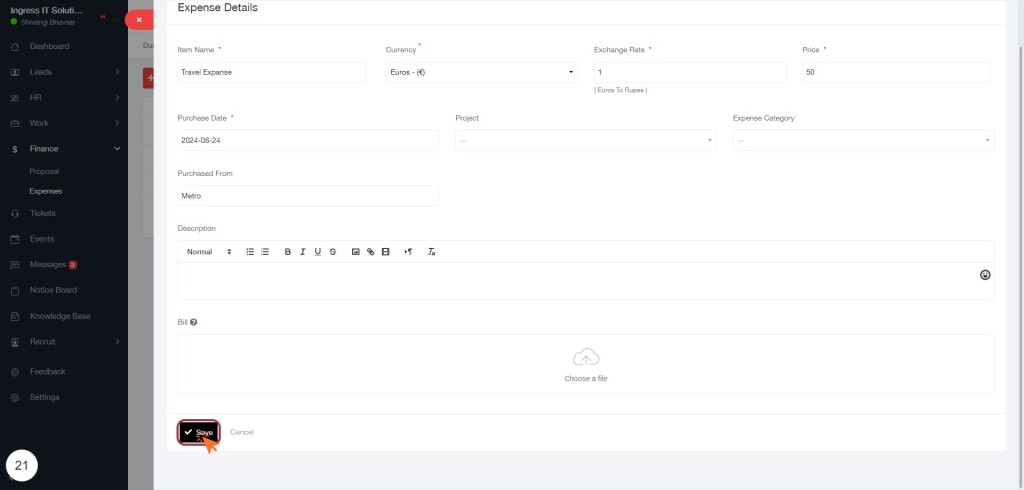
STEP 22: Click on "Save" to Finalize Expense Details
- Ensure all required fields marked with an asterisk (*) are filled out, including Exchange Rate and Price.
- Review the Item Name, Purchase Date, Purchased From, and Description for accuracy.
- Attach any relevant documents by using the Choose a file option.
- Click the Save button to finalize and submit your expense details.