BizCRM App
A Step-by-Step Guide to Configuring Invoice Prefixes and Formats in Financial Settings
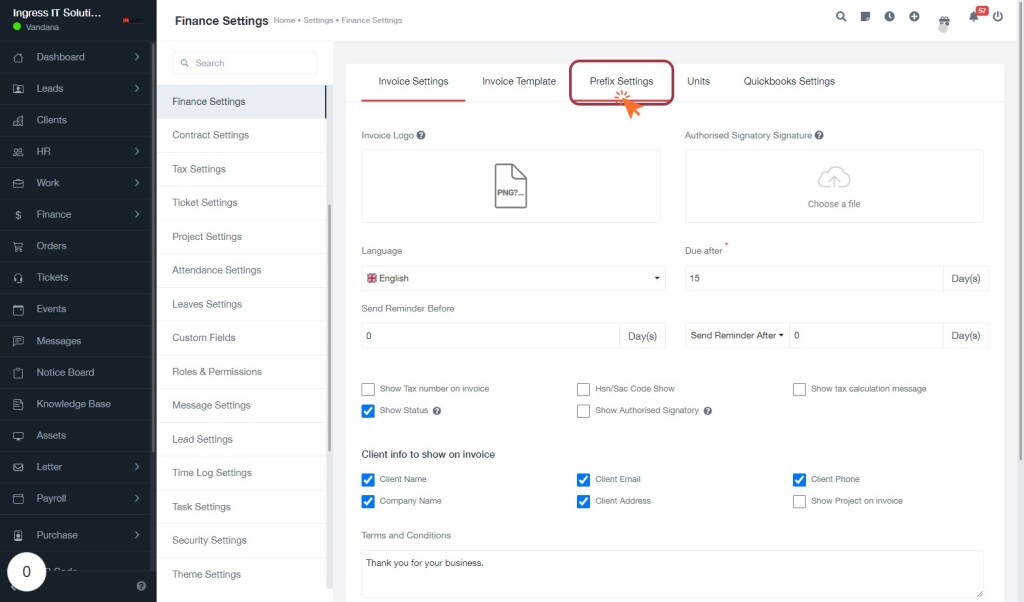
STEP 1: Click on "Prefix Settings" to Access Invoice Configuration
- Navigate to Prefix Settings in the Finance Settings section.
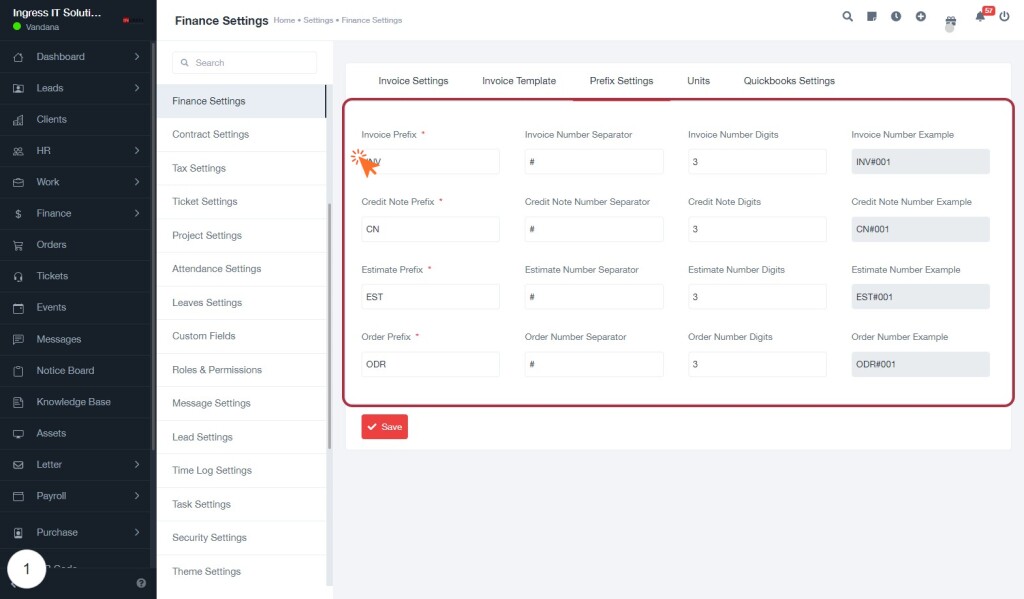
STEP 2: Click on "Invoice Prefix"
- Locate the Invoice Prefix field in the highlighted area.
- This field is mandatory, indicated by the asterisk (*).
- Ensure to fill in the Invoice Prefix to set the prefix for your invoices.
- Review the related fields: Credit Note Prefix, Estimate Prefix, and Order Prefix for additional configurations.
- After entering the prefix, proceed to the next step to input the value.
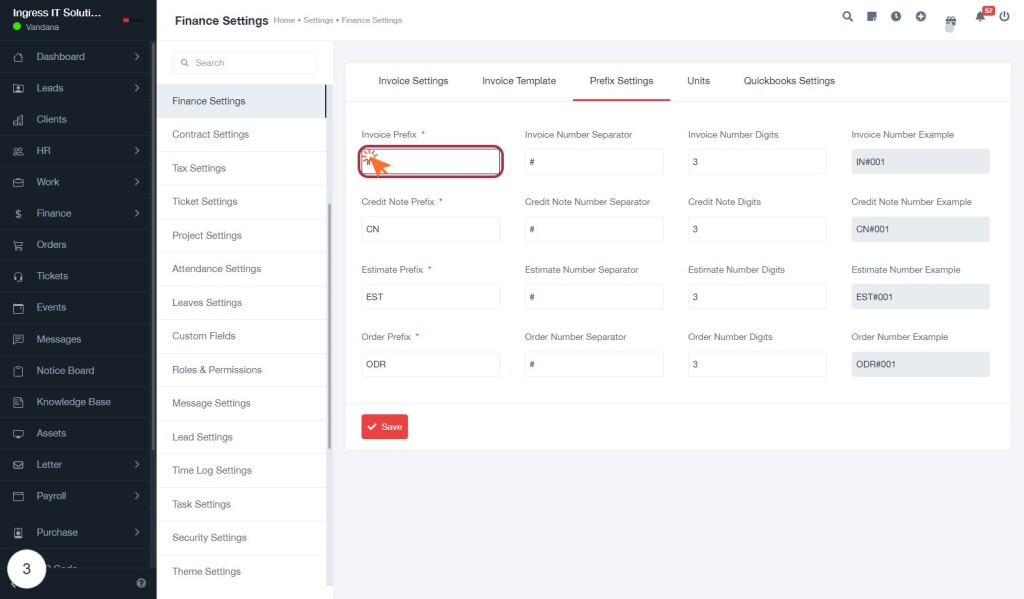
STEP 3: Enter Invoice Prefix Value
- Locate the "Invoice Prefix" input field highlighted in red.
- Click inside the field to activate it.
- Enter your desired prefix value (this field is mandatory, indicated by the asterisk).
- Ensure the value adheres to any specified format if applicable.
- After entering, proceed to the next step by filling in the "Invoice Number Separator" field.
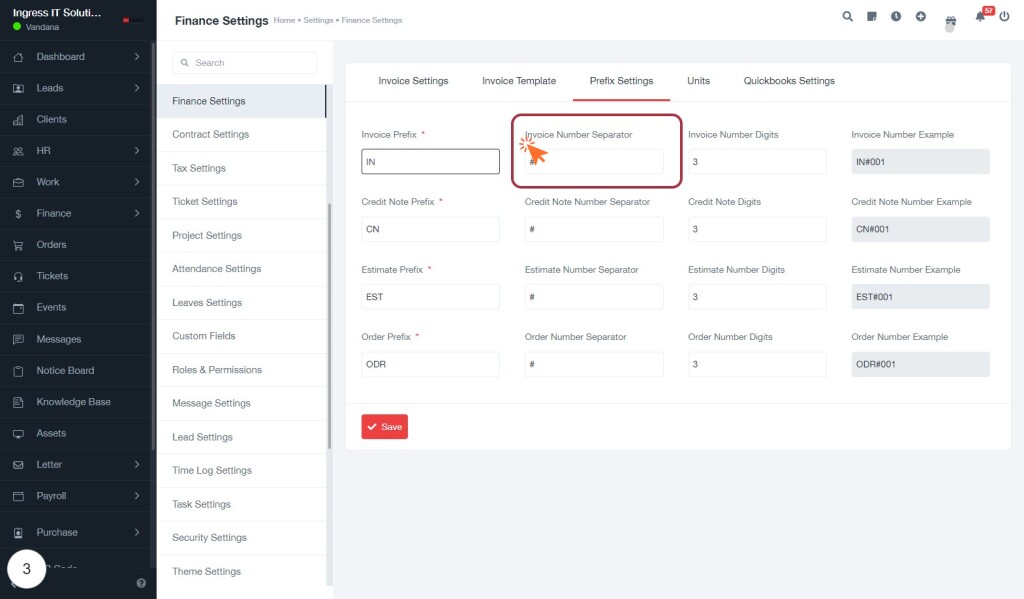
STEP 4: Enter "Invoice Number Separator"
- Click on the Invoice Number Separator field highlighted in red.
- This field allows you to specify the character that separates the invoice number from the prefix.
- Ensure that the separator is a single character (e.g.,
#,-, etc.). - After entering the desired separator, proceed to the next step to enter the Invoice Number Digits.
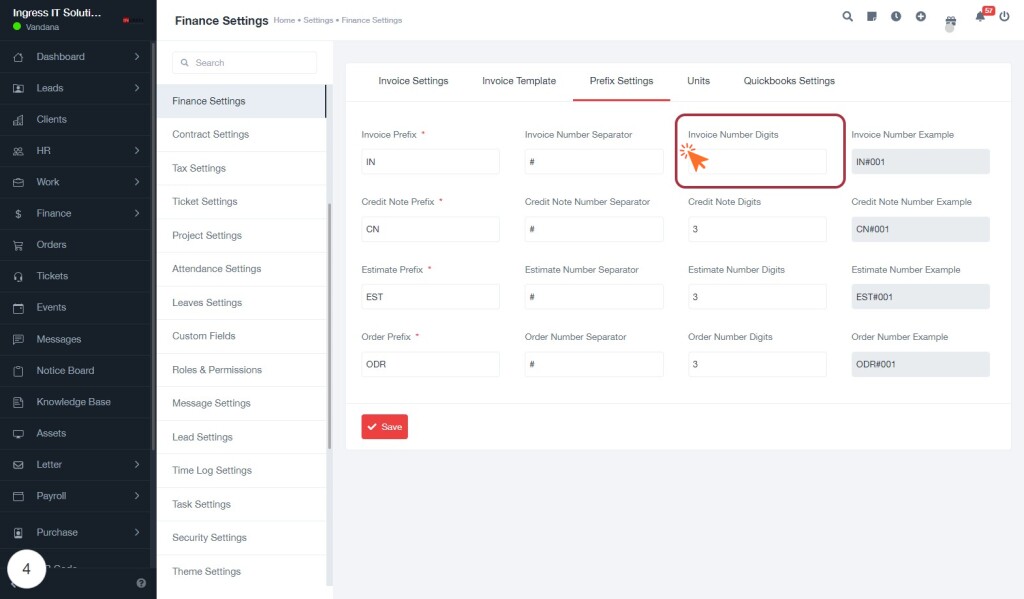
STEP 5: Enter Invoice Number Digits
- Click on the Invoice Number Digits field to input the desired number of digits for invoice numbering.
- Ensure to fill in this field as it is marked with an asterisk (*), indicating it is required.
- Review the Invoice Number Example on the right to understand how your input will affect the final invoice format.
- After entering the digits, proceed to the next step to review the example provided.
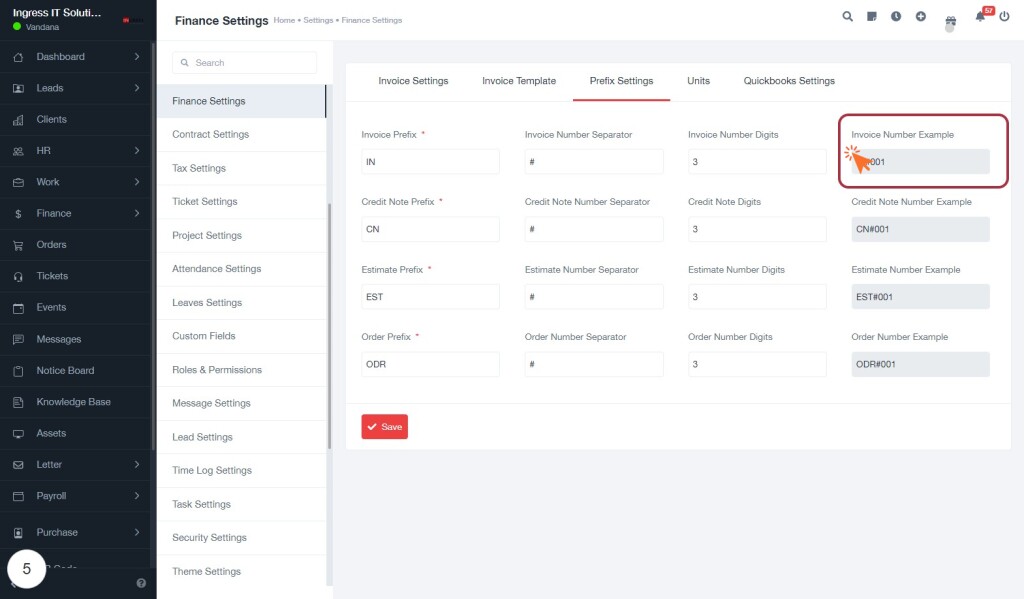
STEP 6: Click on "Invoice Number Example" for Context
- Review the "Invoice Number Example" displayed in the highlighted area.
- This example provides context for the invoice number format.
- Ensure that the invoice number digits and separators are set correctly in the adjacent fields.
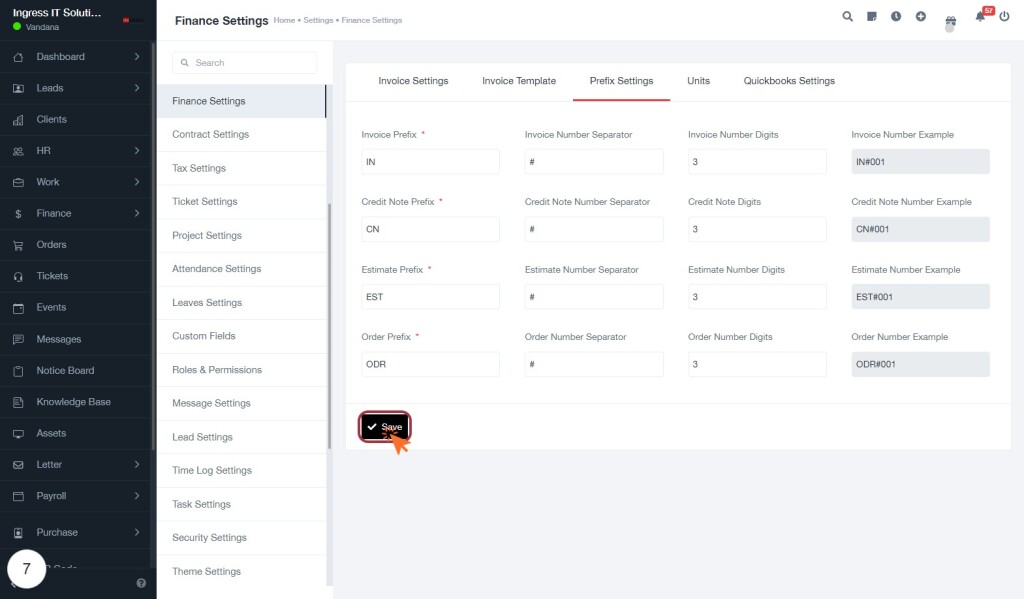
- After reviewing, proceed to the next step by clicking on "Save" to apply your settings.
STEP 8: Click on "Save" to Finalize Settings
- Ensure all required fields marked with an asterisk (*) are filled in.
- Review the "Invoice Prefix," "Credit Note Prefix," "Estimate Prefix," and "Order Prefix" entries.
- Click the Save button located at the bottom of the form to save your changes.
- Confirm that the settings have been saved successfully by checking for any confirmation messages.
